

Over time, acrylic shower pans become opaque. This seriously affects the aesthetics of your bathroom, causing a bad impression on your guests. If several years have passed since you installed your shower pan, maybe it’s time to replace it.
Replacing a shower pan isn’t as difficult as it sounds. In fact, you can do it by yourself with the necessary knowledge and the right tools. If you don’t have the money to pay contractors to do the job, you certainly need to read this.
Today, we’ll show you how to replace a shower pan in simple and easy-to-understand steps. You’ll also find a detailed list of all the tools and materials that you’ll need.
What Is a Shower Pan?
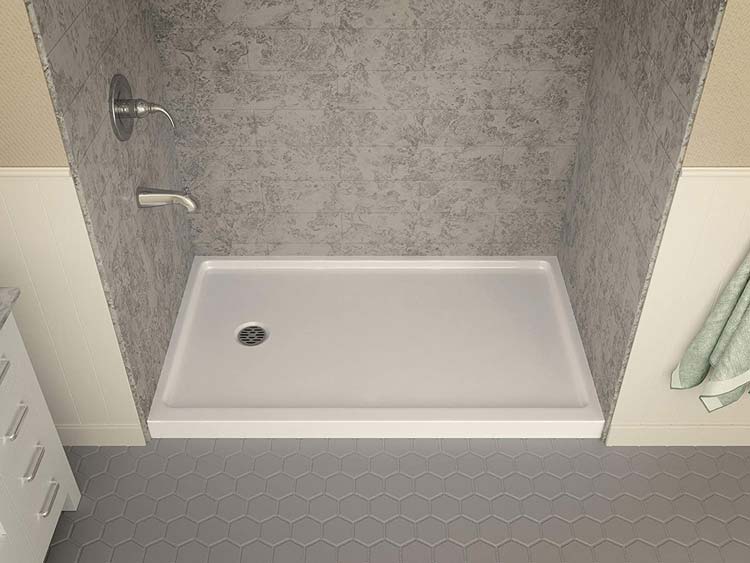
The shower pan is the covering of the shower floor. It extends 4-6 inches up around the shower perimeter. It usually has a square or rectangular shape, with a hole in the middle that’s connected to the drain pipe. The surface is slightly tilted towards the center so that the water runs off easily to the drain.
Most shower pans on the market are made of acrylic resin. This material is waterproof and resistant to heat and wear. Also, it doesn’t turn yellow when directly exposed to UV rays. So, you can also use acrylic shower pans in outdoor showers.
Acrylic shower pans are very easy to clean and prevent the accumulation of pathogens. However, it isn’t recommended to use harsh chemicals because they tend to dull the surface.
On the other hand, custom shower pans are built-on site according to customer requirements. They can be made of concrete or synthetic resins. Usually, the product is directly poured into the shower floor and then molded with special tools.
Replacing a Shower Pan – 7 Easy Steps!
Tools and materials
- Measuring tape
- Bubble level
- Rubber mallet
- Hammer
- Drill and drill bits
- Reciprocating saw
- Cold chisel
Procedure
- First of all, turn the water supply off. This will help avoid a possible disaster in case you break a pipe or connection during the installation process. Also clear the working area and keep all your tools and materials in a visible place to prevent accidents.
- After that, start removing the shower doors. To do this, just unscrew the fasteners on the wall. Then, remove any other elements that may prevent the removal of the shower pan.
- Use a reciprocating saw to cut the portion of the shower pan around the drain. Then, unscrew the fasteners and remove the old shower pan.
- After that, install a new shower pan with the same dimensions of the old one. To do this, just support the shower pan on the wooden studs and fix it with galvanized screws. In case there are no wooden studs, build a shower base with 0.5-inch plywood strips. Also use a bubble level to guarantee that the shower pan is perfectly horizontal.
- Then, Install the new drain on the center of the shower pan. Before screwing the shower drain, you should install a rubber washer to prevent water leaks.
- Apply silicone sealant to the edges if the shower pan needs to be screwed on the wall. This will avoid water leaks. In other cases it may be necessary to apply a special mortar. In either case, carefully follow the manufacturer’s recommendations.
- Finally, install new tiles and the rest of elements removed before.
Notes:
If your shower walls are coated with fiberglass panels, removing the shower pan will be more difficult. In this case it’s recommended to remove all the panels first and then the shower pan. It isn’t recommended to pry up the bottom borders because the panels may deform and break.
Summary
As you can see, replacing a shower pan is the easiest thing to do. Just carefully follow the tips on this installation guide and everything will be fine. Before installing your new shower pan, it’s recommended to take a look at the user manual of the product. The installation process may vary slightly depending on the model and brand of your new shower pan.
Make sure to apply enough silicone sealant around the shower pan to prevent water leaks. If the water seeps under the base, it will penetrate the wooden studs. When wood is wet, it tends to decompose and mold and mildew stains begin to appear.
FAQs
Q. 1: Is it possible to replace just the shower pan?
Ans. Yes. In some cases it’s possible to replace the shower pan without removing other elements of the shower like doors and tiles. However, in this case the removal process will be much more difficult. For that reason, the best method is replacing the wall covering along with the pan.
Q. 2: What is the average replacement cost of a shower pan?
Ans. It all depends on the type of shower pan you want to install. For example, plumbers charge about $65 an hour to build custom shower pan. On the other hand, the minimum installation cost for a precast model is $650.
Q. 3: Is it possible to replace a shower pan without removing tile?
Ans. Yes. But, it isn’t the most appropriate method. Usually, the wall tiles overlap the edges of the shower pan. So, if you don’t remove the tiles, there’s a high probability of breaking them while uninstalling the shower pan.
Q. 4: What is the best method to remove stains from shower floors?
Ans. In most cases, applying a mixture of baking soda and vinegar gives very good results. To do this, sprinkle baking soda on the shower floor. Then spray the surface with vinegar and wait a couple of minutes. Finally, scrub the surface with a hard bristle brush.
If the stain is very difficult to remove, you’ll need something more aggressive. Cleaners based on chlorine, ammonia, sodium hydroxide and hydrochloric acid are very effective. However, it isn’t recommended to apply them on acrylic surfaces.
Q. 5: Can I install wall tiles over a plastic shower pan?
Ans. Yes. As said before, the wall tiles overlap the borders of the shower pan. Before installing tiles, it’s recommended to apply silicone sealant around the edges of the shower pan to prevent water leaks. It’s also recommended to seal the joint between the tiles and the shower pan, where mold and mildew tend to grow.

Leave a Comment