
To avoid water leaks, it’s mandatory that your shower floors are properly waterproofed. There are many different additives on the market to reduce the permeability of mortar. However, the results aren’t always satisfactory. There’s always a chance that some of the water will escape through the pores.
To avoid unwanted surprises, it’s better to install a shower pan liner under the mortar layer. Doing this will guarantee that the water ends up in the drain and not inside the shower floor. If you have problems with water leaks below your bathroom, installing a liner will be the ultimate solution.
Today, we’ll show you all you need to know about liners. Plus, you’ll find a step-by-step guide on how to install a shower pan liner the right way.
What Is a Shower Pan Liner Made of?
A shower pan liner is a waterproof membrane that goes under the cement mortar layer of the shower floor. Its sole purpose is to collect the water that percolates through the shower floor and take it to the drain.
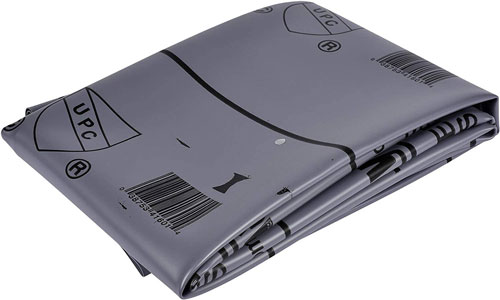
Usually, liners are made of:
- PVC (Polyvinyl chloride)
- CPE (Chlorinated polyethylene)
Both materials are waterproof and resistant to high temperatures, impacts, and punctures. Usually, liners need special glue to be installed. PVC and CPE use different glues and it isn’t recommended to apply PVC glue on CPE and vice versa.
Liners are commonly sold in the form of thin layers. They’re usually 4-6 feet wide. Once installed, the liner should extend 4-6 inches up around the shower perimeter. This configuration allows for collecting the water that falls through the walls.
In case of tearing or puncture, you can easily repair a liner by sticking a patch. However, if the damage is too serious, it’s recommended to completely replace the liner.
How to Install a Shower Pan Liner?
Procedure
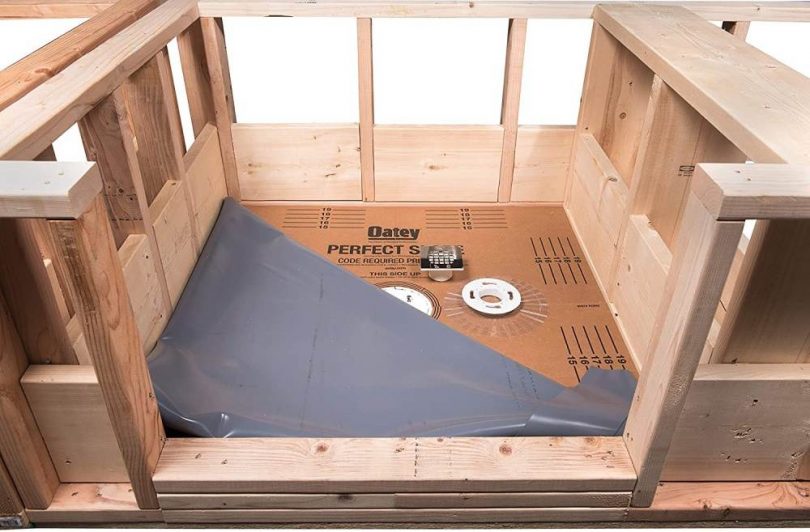
- First of all, sweep out the rustic concrete floor or the wood subfloor to remove any dust residue. Make sure there aren’t nails, screws and any other sharp objects that can puncture the liner.
- Cover the underside of the liner with the recommended glue. Apply enough glue to guarantee good adhesion.
- After that, place the liner on the shower floor. Make sure the borders cover 4-6 inches of the perimeter walls. The shower curb should be totally covered.
- Using a squeegee, remove any trapped air bubbles under the liner. Then, set screws along the borders of the liner, 1 inch above the floor level.
- Then, use a utility knife to cut X’s where the drain and the retaining bolts are located.
- Cover 1-inch of the upper border of the drain with silicone sealant. Then, fold the edges of the liner around the drain and push them against the silicone.
- After that, install the drain clamping ring and its retaining bolts.
- Then, cover the shower curb with steel mesh. Make sure the sharp edges of the mesh don’t puncture the liner.
- Screw the shower drain head 1.5 inches above the shower floor level.
- Then, pour the top mud bed on the shower floor and the shower curb. Wait at least 7 days for the concrete mortar to completely cure.
- Finally, start tiling the shower floor and perimeter walls.
Perform a leak test
After installing the liner, is recommended that you perform a leak test. To do this, you just need to buy a 2-inch ABS test ball and insert it into the shower drain. Then, fill the shower floor with water at a level below the shower curb. Then, mark the level of water on the shower curb with a marker. Wait for 24 hours.
If the water level is kept at the same point, everything is fine. On the other hand, if the water level is much lower, there’s a water leak you should fix.
Pour the top mud bed
Once you verify that there are no water leaks, it’s time to pour the top mud bed. It should be 1-1.5 inches high to avoid breaking with high loads. Use enough cement to guarantee high strength.
Precautions to Take
- Make sure there’s no air bubbles trapped under the liner.
- The liner should exceed 4-inches in all directions the total shower area.
- Don’t install the tiles until the top mud bed is fully cured and reaches most of its maximum strength.
- When installing the tiles, leave an adequate slope for the water to easily run to the drain.
Summary
As you can see, you don’t need fancy tools or professional support to install a liner. The only thing you need to do is follow each of the tips in this installation guide. Don’t forget to perform a leak test before installing the rest of the coatings. If you don’t, you’ll probably have to demolish everything in case of a water leak.
The top mud bed must be resistant enough to withstand high loads. So, make sure to make it thick enough and adding the required amount of cement. Also, cover the shower curb with steel mesh to guarantee the adherence of the concrete mortar.
FAQs
Q. 1: Does a thin set stick to a shower pan liner?
Ans. No, the thin set sticks to the top mud bed and fixes the tiles in place. The liner sticks to the rustic concrete surface, below the top mud bed.
Q. 2: Can I install tiles over a shower pan liner?
Ans. Yes, but you first need to pour the top mud bed that supports the thin set and the tiling.
Q. 3: How far a shower pan liner should extend up the wall?
Ans. The liner should extend 4-6 inches up the wall.
Q. 4: Is it necessary to install a shower pan liner?
Ans. Yes, liners are essential to prevent water from leaking through the shower floor.
Q. 5″: What is the lifespan of a shower pan?
Ans. Most shower pans have a minimal lifespan of 10 years. However, as long as there are no water leaks on the shower, it isn’t necessary to replace them after that time.

Leave a Comment