
Projects involving water require you to shut off the water source when the shut-off valve is not working. Shutting off the water protects you from expensive water damage and lets you do the repairs inexpensively.
Here we will look at why the water shut off valve not working and how it can be fixed.
The Shut off Valve
All fixtures and appliances (toilet, washer, water heater) have a shut-off valve to turn off the water supply when a repair needs to be done. If for some reason, the inside shut-off valve to the appliance and fixture doesn’t shut off, you can use the main shut-off.
The shut-off valve on an appliance or fixture is a convenient fail-safe. Before starting the repair, you will need to know what valve isn’t working.
Two types of shut off valves
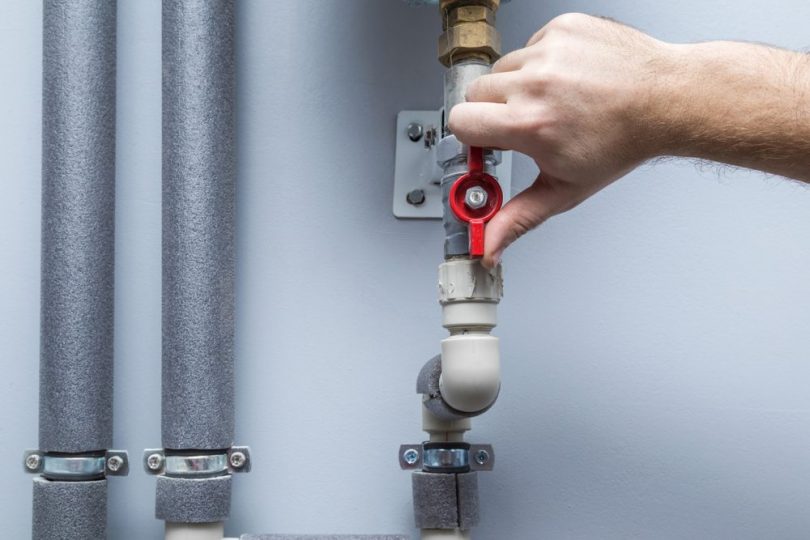
1. Shut-off valve indoor water
The main shut off valve in your house may be located in the basement, usually on the inner side of an exterior wall. This valve lets you turn off the water to the whole house from the inside.
Each appliance and water using fixture in your home will have its valve nearby. This lets you to turn off the water to that fixture while leaving water access to the rest of the house.
This is helpful if you have two bathrooms and one needs repairing.
2. Shut off valve outdoor water
The outdoor water valve is located on the house’s outer wall or in a ground box buried in the lawn. This valve shuts off the water to your house.
This is the fail-safe for when an indoor valve leaks or pipe bursts. It’s turned off from the outside of the house.
Water Shut Off Valve Not Working: Common Problems
Never ignore a water issue; they are a costly repair and water can do a lot of damage quickly!
1. It’s stuck!
A stuck valve won’t turn, try spraying it with WD-40, allow it to set in for 20 – 30 minutes, then try and turn it again. If this doesn’t fix it, the valve will need replacing.
To avoid this in the future, crack your valves off and on once a month and lubricate them. This will keep them in good shape.
2. Older fixtures
Older houses have older fixtures that wear out over time and need replacing. It is easier to replace these fixtures when you find them in need of repair than to wait until there is a problem.
Sometimes old homes have a saddle valve (T-shaped valve on the outside) that is prone to leaking. If you find you have one, save yourself time and money and replace it then.
3. Dripping
Nothing lasts forever, shut off valves are no exception. Just turning them off and on can cause it to drip. Try tightening up the valve to see if the dripping will stop.
If it continues to drip, this valve will need replacing. If there is dripping on the main valve outside the house, that too will have to be fixed or replaced.
4. The pipe burst
It’s not unusual for homeowners to turn off the water to the house when they go on vacation. Unfortunately, water gets trapped between the spigot and the shut-off valve; the pipe can freeze and burst in the winter.
This happens when the pipe thaws. Before turning it back on, look for puddles of water by the appliance/fixture, then turn the water back on.
You should look at this area frequently to ensure there is no issue.
5. Partially closed
The shut off valve must be completely closed. If your valve did not get closed properly for some reason, the valve will need replacing so it can be completely shut off.
How to Easily Fix a Malfunction ing Water Shut-Off Valve
Tools
- Plumber’s tape
- Pipe wrench
- Adjustable wrench
- 4-in-1 screwdriver
Materials
- Leather washers
- ¾ inch ball valve
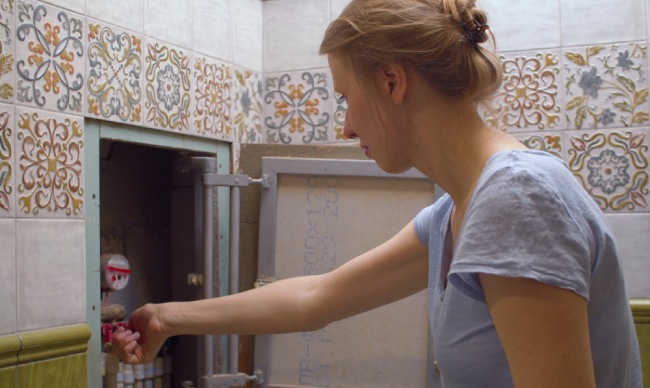
Finding the main water shut-off valve
Where is the main water shut-off valve
The main shut off valve will be in the basement on an external wall or in buried the lawn near the street-side of the property.
Main water shut-off valve: Turning it off
Turn off the main shut off to the house in your basement.
Shut off the local water
If the main is on the lawn on the street-side, you must call the local water authority.
Manually turning off the water supply
Step 1: Closing the toilet’s shut off valve
The shut off valve should be located behind or on the pipe coming from the toilet (if you live in an older home and do not see one, shut off the main water valve). The valve is oval or “football” shaped.
Step 2: Turning the valve clockwise
Slowly turn the valve clockwise until it doesn’t turn anymore, do not use force!
If it is difficult to turn or appears rusty, spray with WD-40 and wait half an hour, then try again. If it is partially closed, turn off the main shut off valve and replace this now!
Step 3: The Water Needs to be Off
To confirm the water is off, flush the toilet. The tank should empty into the toilet’s bowl and not refill itself. If you think it could be clogged, pull the tank float up and pull on the handle, no water should fill the tank.
Step 4: Turning the Water On Again
Once the job’s done, turn the toilet shut off counterclockwise and flush the toilet. If the tank fills with water, your work here is done!
Main shut off valve replacement
When the main shut off valve is closed, there should be no water coming to the house; if there is, you will have to replace it with a new ball valve. This is a fairly easy job.
Step 1: The Valve is clogged
Test the street-side valve to ensure it works by turning it off and on. As time goes on, these valves get mineral deposits and cruddy build-up. If this needs replacing, call the local water authorities.
Step 2: Loosening an old valve
First, you will need to locate the bonding jumper; it should run from the side of your house on the street-side to a clamp by the meter – to the clamp in the house side of the meter.
Next, leave the bonding wire in place and try to unscrew the old valve. If you can not do this, LEAVE IT ALONE.
You can fix this by putting in two new clamps and a longer section of copper wiring (4AWG for 200-amp service or 6AWG for 100-amp service).
Once completed, remove the older, shorter bonding jumper. The street-side valve needs shutting off where it comes into the house.
Remove the nipple from the old valve after loosening the coupling nut. Then, at the house-side of the meter, remove the old valve and remove the oil-soaked leather washer that provides the seal inside this coupling.
Step 3: A leather washer
Despite being hard to find (check your plumbing supply store or look online), leather washers work the best and do not crack as they get older, like the neoprene version.
Step 4: Installing a new valve
You want to replace the older gate-style valve (they have a history of leaking) with a ball valve replacement. Go with the ¾ inch ball valve as most pipes are ¾ in diameter.
Using plumber’s tape or pipe dop, wrap it around the pipe threads (this will seal that joint tightly), put in the new leather washer, then the old nipple, place the coupling nut in place and tighten it.
Now, check for leaks by turning on the water.
Leaking after replacing other parts
If there is a leak, there is a poor seal somewhere. After shutting the water off, retighten the fitting on the shut off valve and see if that helps.
If it leaks, replace the washer after taking the valve apart. If it still leaks, replace the valve.
When to hire the plumber?
If you don’t feel comfortable working on the plumbing, if the job is more than you can do, or if you tried to fix it and can’t get it done no matter the reason, it is time to call the plumber.
When to have a reliable local shut off valve system
What the building code requires
Standard building codes ensure all buildings have the proper shut off valves safely and conveniently in place.
During major renovations, easy access is key
Anytime you are doing home renovations that involve pipes and water, you want it to be as easy as possible.
Make sure you have shut off valves for each fixture or appliance so you can shut off the water in minutes.
Making emergencies easier
You do not want to be looking for a shut off valve as the water pours into your house.
Make sure you know where the shut off valves inside and out are located and that they are all in good working order.
Tips for water shut off valve repair
Valve is partially closing
The only sure fix for a partially closed shut off valve is to replace it.
Valve is stuck
WD-40 is your best option to get a stuck valve loose because you can’t use force; it lets you lubricate the valve, wait for it to work, and then loosen the valve.
Valve is leaking
You can purchase a stem kit that includes a washer, gasket, and new stem unit that can be used in the multi-turn shut off valve (the valve used to turn off fixtures in your home.) instead of replacing the whole valve, you can replace the washer which is causing the leak with this kit.

Leave a Comment