
In some places, water service isn’t exactly the best of all. The contaminants dissolved in water are so small that they can be easily absorbed through the skin. This may happen with substances as dangerous as mercury and lead.
When this occurs, your skin isn’t the only one at risk, but your overall health. To prevent this, it’s important that you install water filters in your home. If you live in a big house, installing a main filter for the whole property might seem too expensive.
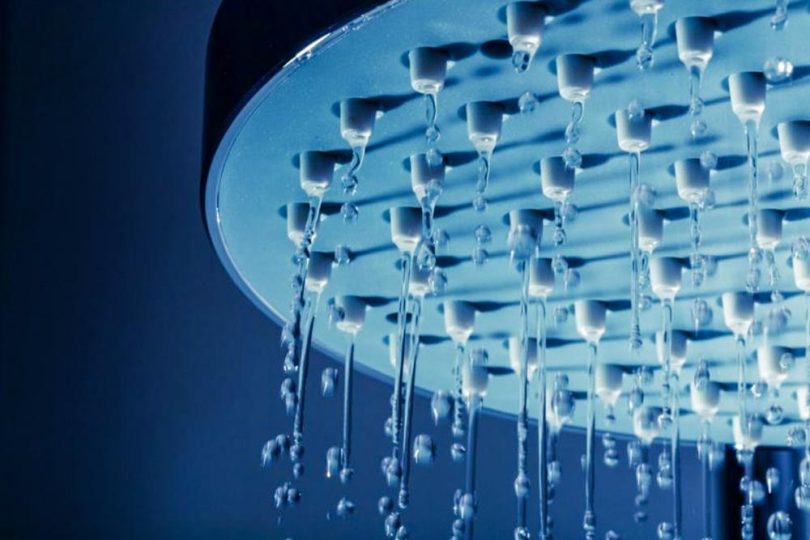
However, installing a high-quality shower head filter on each bathroom is a good way to start. Shower filters are cheap, practical, and easy to install. If you’ve never installed one and you need help, don’t worry.
Here’s a step-by-step guide on how to install a shower filter.
How to Install a Shower Filter In 8 Easy Steps
Step 1: Gather all the necessary tools and materials
First of all, you’ll need the required tools and materials to get the job done. Here’s a list of all:
- Showerhead
- Pliers
- Teflon tape
Step 2: Remove the old showerhead
Once you have all the required tools and materials, you can start removing the old shower head. First, try to do it with your bare hands, turning counterclockwise. Usually, rust tends to accumulate in the thread, making uninstallation difficult.
If this happens, apply several drops of rust remover or silicone lubricant around the thread. Then wait a few minutes for the product to take effect. After that, try removing again using your hands. If nothing happens, use some pliers.
Step 3: Seal the shower arm
To prevent water leakages, the union between the shower arm and the shower head must be perfectly sealed. To do this, cover the thread with Teflon tape, turning the roll clockwise. This way, the Teflon tape won’t detach from the thread when screwing in the shower filter.
Step 4: Put the shower filter in place
After covering the thread with Teflon tape, put the shower filter in place. Then, start screwing in clockwise direction with your hands. At this point, it’s better not to tighten too much. Just apply the necessary pressure to keep the shower filter steady.
If the shower filter includes nuts, use the pliers to tighten them, applying ¼ turn clockwise.
Step 5: Turn on cold water
Now it’s time to check possible water leaks and remove contaminants inside the filter. To do this, just turn on the cold water and let it run for about 5 minutes. Check if there’s water around the thread. If this happens, turn off the water, uninstall the shower filter and repeat steps 3 and 4.
If everything is fine, wait until the 5 minutes are over. During that time, you’re likely to find small black particles on the water. Don’t worry about that. Those are coconut carbon pieces that usually come out from the filter with the first use.
Step 6: Turn on the hot water
After the first 5 minutes are over, slowly turn on the hot water. Then, wait 5 minutes more. During this period, the black particles must have disappeared. However, the water still doesn’t seem clear enough. So, let the water run until it’s comes out crystal clear from the shower head filter.
Step 7: Give the final touch
Once you’re satisfied with the results and have ensured its effectiveness, completely screw the shower filter using your hands or pliers.
Step 8: Check the shower
To check if the shower filter really works, take some water samples and send them to a laboratory for a test. But if you don’t want to wait for too long to get the results, you can buy your own water quality tester.
These devices determine the concentration of dissolved materials in the water, measuring the conductivity of the fluid. Water has a higher conductivity when the concentration of minerals is high. This tool is especially useful in places with hard water problems.
Precautions to Take
Before buying any shower head, it’s convenient to check the quality of the materials. To do this, you could visit several physical stores to see for yourself. On the other hand, if you prefer to buy online, check out several reviews from former buyers on shopping websites.
Also make sure the water filter cartridge is durable and easy to replace. Most water filter cartridges have a lifespan of 6 months.
However, it all depends on the quality of water and properties of the filter. So, if the water quality where you live isn’t the best, you may have to replace the cartridge every 3 months.
When using the shower filter for the first time, it isn’t convenient to turn on the hot water at once. If you do this, you may burn your skin. It’s better to start turning on the cold water and then slowly adding the hot water.
Also, make sure the thread patterns of the shower arm and the filter aren’t incompatible. This may happen with products made in foreign countries. Although the diameter is the same, if the threads aren’t compatible, the shower head is virtually impossible to install.
Conclusion
As you’ve figured out how to install a shower head filter, I’m sure you’ll agree that the process is pretty straightforward and doesn’t take much effort. You won’t need any previous experience or complicated tools to do it. Additionally, shower head filters offer numerous health benefits.
Our today’s guide is focused on helping you take care of your plumbing needs effortlessly. If you can manage to follow each of the steps indicated in this installation guide, you’ll become a pro at this in no time.
Now that you are familiar with the installation process, you can move forward with your plan. Thanks for reading this far and best wishes to you.
FAQs
Q. 1: Can I add a filter to a shower head?
Ans. Yes. You can choose between an independent filter and a shower head filter. In the first case, the filter is installed just before the shower head. On the second case, the filter also works as the shower head.
Q. 2: Should I filter my shower water?
Ans. Yes. It’s recommended to filter the shower water to remove dissolved contaminants, such as chorine, lead, mercury, limescale, insecticides and pathogens.
Q. 3: Willa shower filter help my hair?
Ans. Yes. Excess minerals in hard water may affect the health of your hair. A shower filter acts like a water softener, eliminating those minerals and making your hair softer and brighter. Some filters add vitamin C to water to revitalize your skin, hair, and nails.

Leave a Comment