
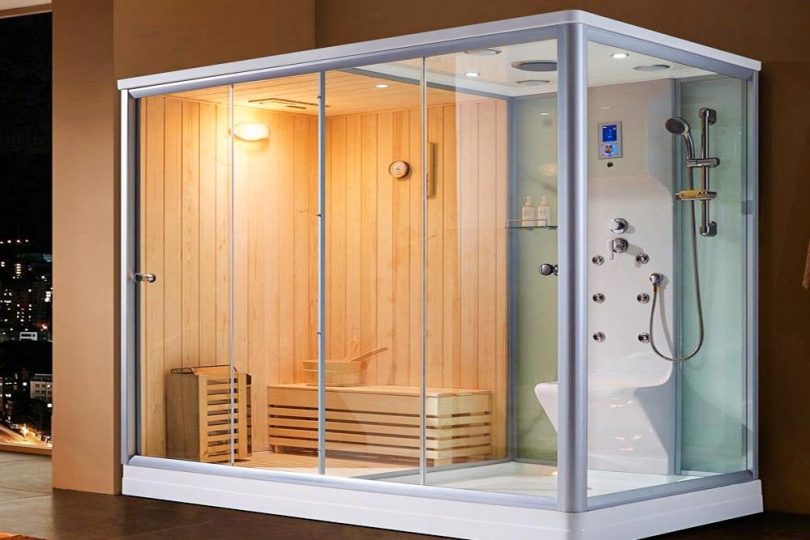
There’s nothing better than getting into a steam shower and enjoying a relaxing session of scented steam. Certainly, that’s all you need to get rid of the stress of your daily routine. In addition, steam will improve the overall appearance of your skin, making it softer and brighter. It is an excellent wet alternative to infrared saunas.
Building a steam shower on your own requires time, money and planning. However, if you can’t afford the best steam shower out there, you can save your valuable resources by learning to do it by yourself. And the process isn’t as difficult as many people believe.
Today, we’ll try to explain how to build a steam shower following construction guidelines from the Tile Council of North America and other important regulatory organizations.
How to Build a Steam Shower: A Step-By-Step Guide
1. Make your design
First of all, your design must adapt to the available space in your bathroom. So, make the corresponding measurements using a measuring tape.
With these measurements, draw the perimeter of the shower on a piece of paper. Then, use the same drawing as a design guide to make the spatial distribution of the accessories.
2. Choose the perfect seat
Your shower head should have a comfortable seat. If there’s enough space, you could choose a built-in bench.
On the other hand, if the space is small, it’s better to opt for a folding seat. The seats must be waterproof to prevent proliferation of mold and other pathogens.
3. Find the right place for the steam generator
The steam generator must be located away from the seat and the entrance. However, the control panel must be near the seat.
That way, the user doesn’t need to move to control temperature, steam flow and other important function s. Usually, the control panel is located 4 feet above the floor.
4. Slope the ceiling
Sloping the ceiling allows condensed water on its surface to drain easily. If the ceiling is completely flat, the water drops would drip on you.
For a residential steam shower, 8.33% of ceiling slope is more than enough.
However, if the area is too big, sloping the whole ceiling in one direction would greatly reduce the available space. In these cases, you should try to slope the ceiling in two directions, starting from the center of the steam shower.
5. Set the temperature limits
The size and power of the steam generator will depend on the size of your steam shower and the coating materials.
Usually, natural stone dissipates high temperatures better and it tends to accelerate condensation. So, you’ll need a bigger heat generation to prevent this.
On the other hand, if you decide to use synthetic materials, such as plastic or acrylic, you should be careful not to overdo the temperature. Look for expert help to set the right temperature limit according to the type of material.
6. Waterproof the area
To prevent the proliferation of mold on ceilings, floors and walls, it’s necessary to waterproof the area before installing the final coating. In the market, there are many different products for this purpose, such as waterproof grouting, paint and panels.
7. Choose the right insulation
If you have AC units at home, the radiant heat form an uninsulated steam shower could increase energy consumption.
To prevent this, it’s recommended to insulate the exterior walls. In very cold climates, insulation is a must because low temperatures would produce too much condensation.
8. Choose the right door
Glass doors are the most popular for steam showers. Depending on the level of privacy you require, you can choose between clear glass and rain glass.
On steam showers, the doors must be sealed on the top and both sides. Usually, the bottom is left unsealed to allow fresh air to enter and facilitate door rotation.
9. Install the door
If you choose a glass door, hire a professional to take care of the installation. These doors are very delicate and break off easily when they fall to the ground.
Also, you could hurt yourself with the sharp edges of a broken glass.
Don’t forget to install a crossbar if you intend to leave the door open for the shower to dry.
10. Install the steam generator
Before installing the steam generator, make sure you have a 220 volt outlet available in your home. If not, hire a professional electrician to install a new circuit with the required voltage.
The steam generator must be located in a cool and dry place. To protect it from external agents, choose a closed space. Before connecting the steam generator to the water supply, close the main valves.
11. Protect wood framing
If your walls have wood framing, you can protect the studs and joints covering them with 6-mm plastic sheets. Make sure to overlap all the edges by 1 foot.
12. Seal the seams
Use tile mortar and mesh tape to seal the joints between concrete backer board panels.
13. Cover the backer board
Cover the concrete backer board with a waterproof product. You can use flocked polyethylene sheets or liquid polymer coating. Both products leave a thin film on the surface, which is lightweight and water resistant.
14. Tile and grout
Install the tiles using the best tile mortar you can find. If you’re using natural stone, apply a thin layer of impregnator after installation to seal the surface.
15. Seal around fixtures
If there are built-in wall fixtures, seal any openings where water can enter. For making this, follow the recommendations indicated in the user manual.
16. Final touches
Before using your steam shower for the first time, make sure that the electrical connections are properly installed and that the water supply to the steam generator is turned on.
Things to Consider
Before beginning the installation process, it’s important that you consider the following things:
- If there are holes in the ground, you must seal them to prevent water leaking. To do this you can use silicone sealer and waterproof grouting.
- Be sure to properly seal the edges of the door to prevent steam from escaping and condensing out of the steam shower.
- Also, make sure there’s no drywall or plaster parts directly exposed to steam.
Conclusion
As you can see, building a steam shower isn’t as difficult as it seems so you can enjoy all of its benefits. You just need some planning and advice before getting started.
Before choosing coatings and accessories, consider important aspects such as available space, ambient temperature, water pressure and available voltage.
This guide will the most helpful for those who have a basic knowledge about how to build a steam shower and are interested in DIYing.
If you don’t have the knowledge, skills, or experience, feel free to consult a professional.
If you do it yourself, carefully follow the instructions given and you’ll have a function ing steam shower in no time.
FAQs
Q. 1: How much does it cost to build a steam shower?
A. The average steam shower cost is around $4,500 for prefabricated models and between $4,000-$14,500 for custom models.
Q. 2: Can a steam shower be used as a regular shower?
A. Yes. Steam showers have all the amenities of a regular shower, including a shower head and faucets.
Q. 3: Do steam showers cause mold?
A. Yes. Steam showers can cause mold if not dried properly. To prevent this, it’s advisable to keep doors and windows open after each use.
Q. 4: Do steam showers need to be enclosed?
A. Yes. Steam showers need to be enclosed to prevent steam from escaping and condensing in different areas of the bathroom.

Leave a Comment