

Old age is an evident part of human life. The incidence of an unprecedented physical illness at any age can’t be denied. In such frail times of life, a once so simple task like getting on and off the toilet seat can seem rather excruciating to perform on one’s own.
Life is so swamped for everyone in modern days, it’s fairly difficult to constantly find someone around who would assist you or your unable loved one safely to and from the bathroom. In such helpless situations, toilet rails can act as life-savers.
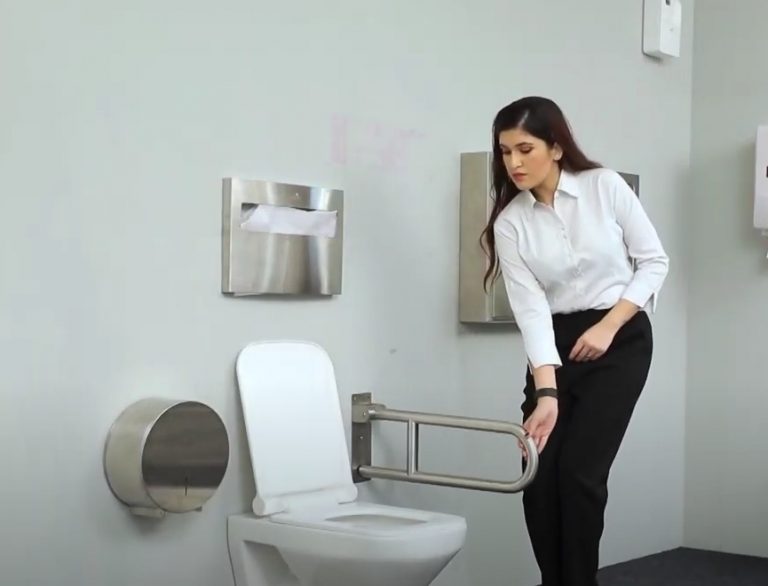
Toilet safety rails are designed to support the user while they are sitting or getting up from the toilet. They are usually placed at one or both sides of your toilet, either on the wall or on the floor. Utterly easy to use, toilet safety rails ensure independence, safety and ease of mobility for anybody with stability issues.
Going to the bathroom seems no more like walking on pins and needles for the disabled or the elderly, but they can once again do so in full confidence with the help of these reliable and sturdy toilet safety rails.
How to Install Toilet Safety Rails
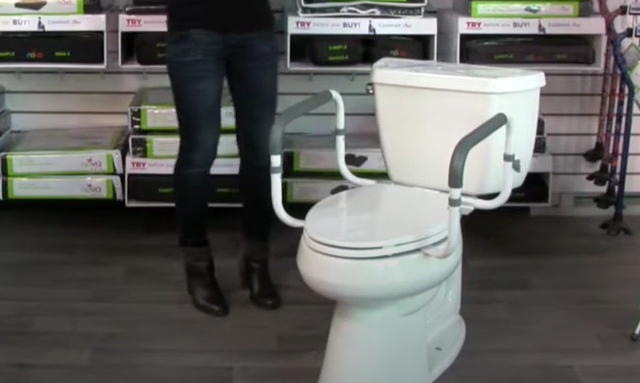
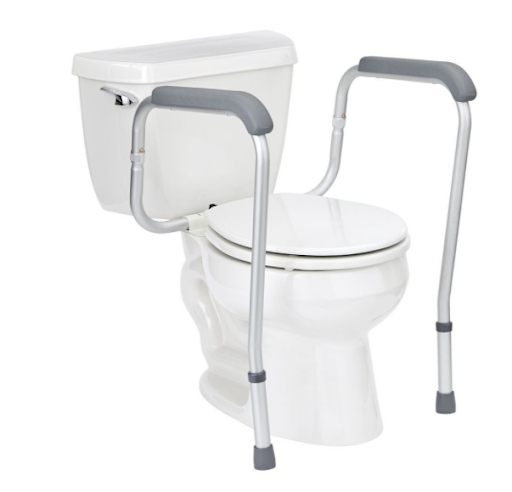
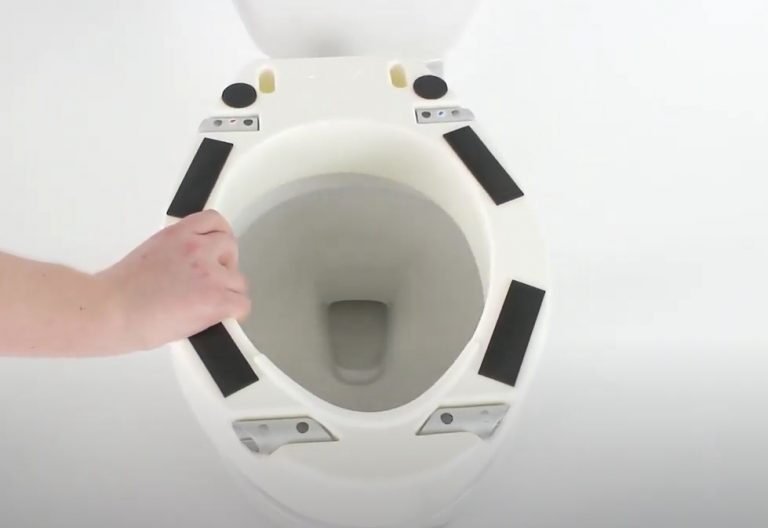
1. Legless toilet rails
Step 1: Assemble the rail and prepare it for the attachment.
Step 2: Take off the big screws off the toilet seat rivet
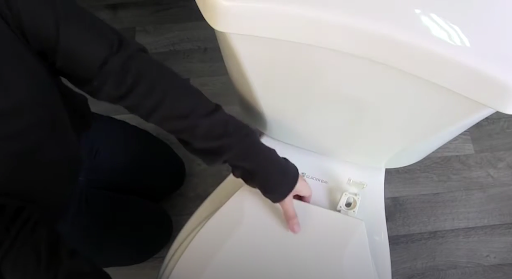
Step 3: Remove and keep the toilet seat aside

Step 4: Align the assembled rail to the mounting bracket
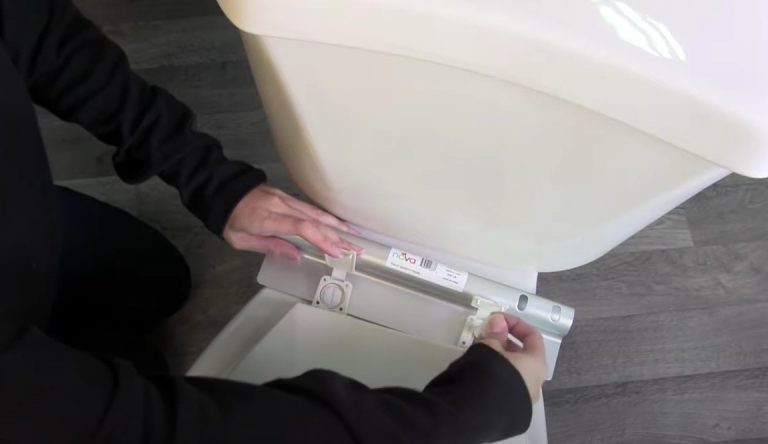
Some models come with adjustable tension knobs that have to be securely winded on either side of the commode base.
Step 5: Assemble the arm-rests one by one by first joining two bars with the wing nut.
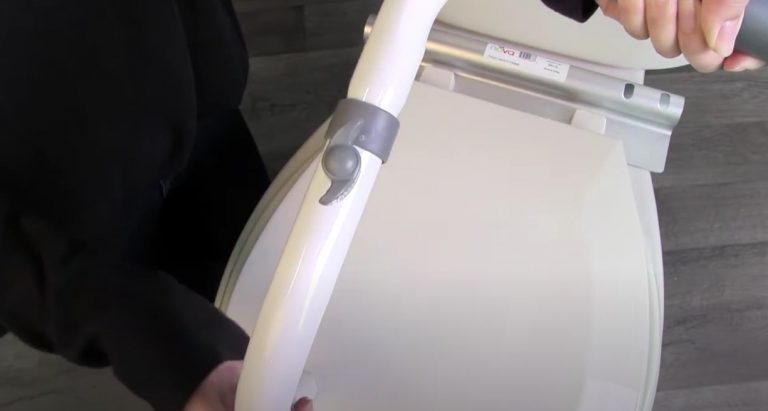
Step 6: Insert the whole arm into the mounting bracket and secure them. Make sure that the push button comes out on the cutout.
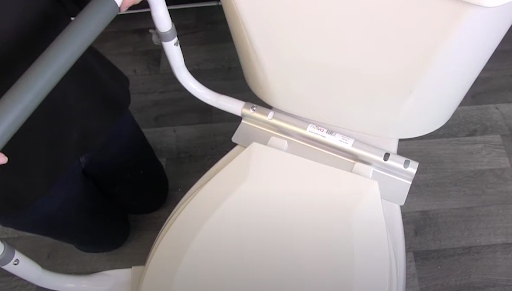
Step 7: Repeat the same process with the other arm and you’re ready to go
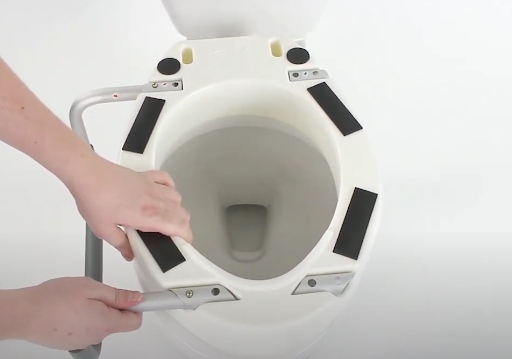
2. Toilet rails with legs
Installing a toilet rail with legs is the same as installing one without legs. There is just one additional step. In case of the “legged” toilet safety rails, simply follow the above instructions. But after putting back the screws, don’t forget to adjust the leg extensions so they stand on the floor with great stability.
3. Toilet riser with handles
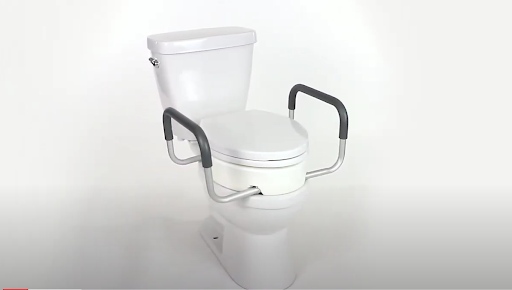
Step 1: Remove the screws of the toilet seat rivet. Take the seat and the lid off.
Step 2: Take the riser and make sure that the side with the grips and sockets is facing you. The riser should come along with its own set of screws washer and wing nuts. The sockets where the arm rests will be inserted, will be usually marked in blue and red to facilitate the correct placement of the arm rests.
Step 3: Attach the arm rest with the red sticker to the red marked socket and the blue stickered arm rest to the blue marked socket.
Step 4: Now that the handles are attached, take the riser, turn the handle sides up and align its holes to the holes of the commode.
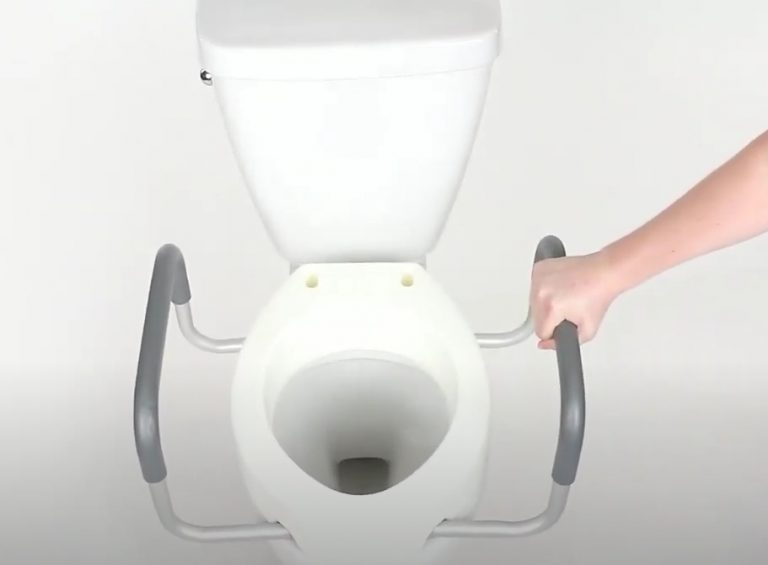
Step 5: Next place the lid on top of the riser seat, aligning it with the holes of the riser and the commode
Step 6: Secure the riser and the lid to the commode with the help of the screws, nuts and washers. You’re Done!

4. Freestanding toilet rails
Step 1: Assemble the parts. The rails of the stand-alone toilet rails usually come separately.
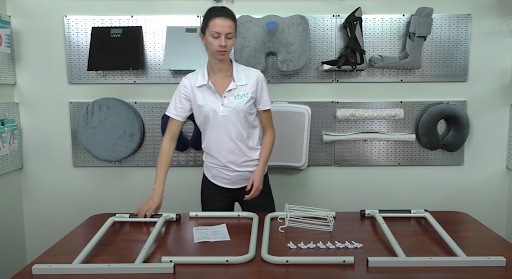
Step 2: Attach the arm rest bars to the base bar with the help of the hand knob screws.
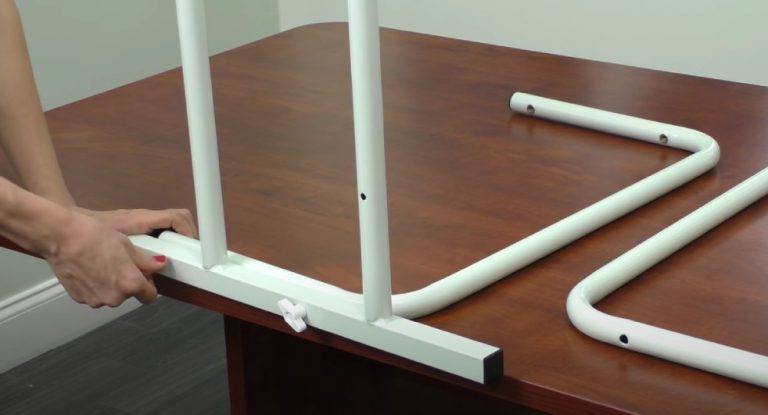
Step 3: Attach the U shaped support bar to the frame with armrests with screws to secure it.

Step 4: You can hang the magazine basket to the side if the manufacturer has provided one.
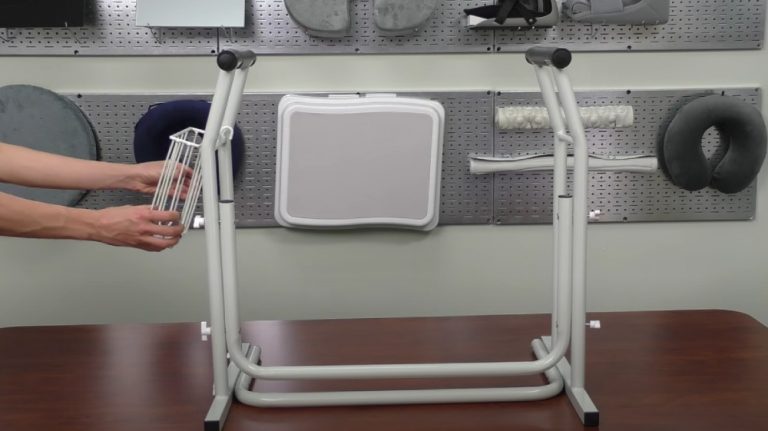
Step 5: Place the rails around the toilet in a way that the handles rest on either side where the arms will rest.
5. Portable toilet or toilet frame
Step 1: Place the frame in front of your commode.
Step 2: Open each leg so that the spring clips safely lock into place.
Step 3: Walk up to the frame and lift it towards the commode.
Step 4: Next unclip the foot plate. Place it on the floor and snap into place.
Your portable toilet frame should now be ready to use.
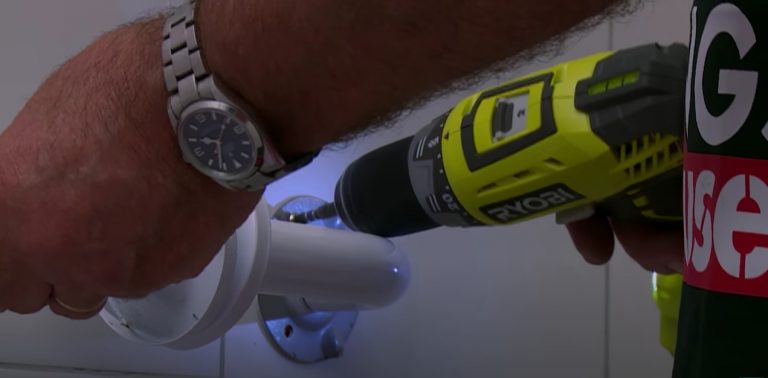
6. Flip up and flip down grab bars
Installing the flip up and flip down bars generally requires a professional plumber or a handyman. So, here are just some tips for the installation:
- You will need tools like the electric drill, punch and masonry bit.
- Wall studs: the gypsum drywall, plaster or tile board on the ceramic walls are insufficient to support the fold down seat, unless you mount it into existing wall studs or wood blockings. To determine if the studs are in place, 1/8th inch masonry bit and drill through the tile.
- Wood blocking: installation of these safety rails require wood blocking in a general stud wall.
- Anchoring: Once the wood blocking is rightly placed, position the safety rail at the required height. Marking the flange and wall bracket screw locations with a marker is useful. Nick the tiles with the help of a hammer and a punch to make sure that the drill bit is secure. Use a masonry bit and later drill through the tiles. Carefully select the anchoring hardware to ensure correct installation.
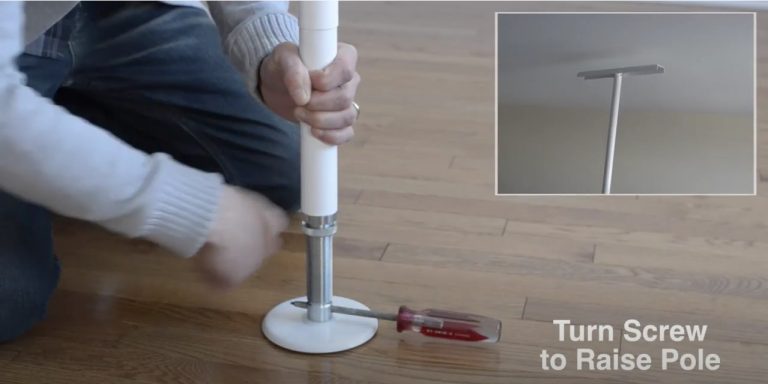
7. Floor to ceiling pole
Step 1: Place the base of the pole on the floor of your toilet.
Step 2: Insert a screwdriver into the hollow of the base and rotate it to raise the pole towards the ceiling.
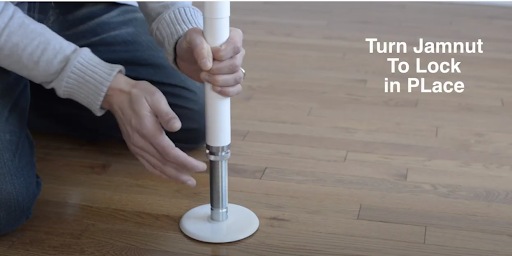
Step 3: When the pole reaches your desired height, turn the jam nut to lock the pole in place.
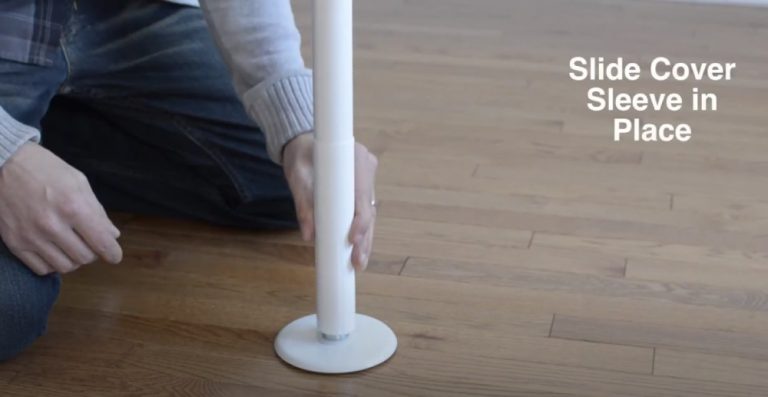
Step 4: Slide down the cover sleeve to hide that area. Voila, your pole is ready.
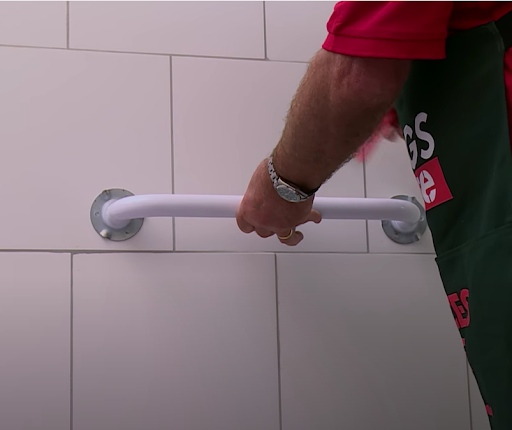
8. Grab bar toilet paper holder, 90-degree grab bar, Angled grab bar
The installation process is almost identical, except that they have to be positioned at different angles and positions.
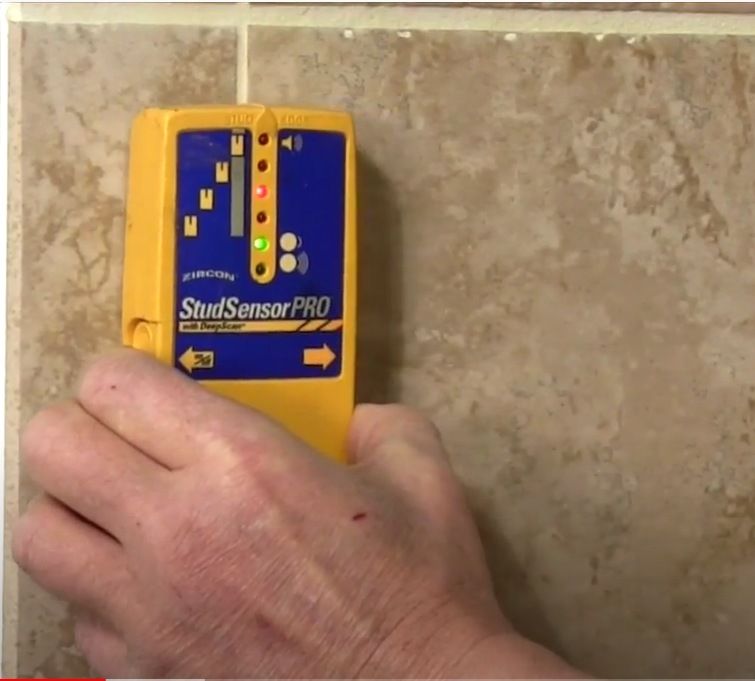
Step 1: With the help of a stud sensor or any other technique, find the studs near the spot where you want to place your grab bar. Make some light marks at the center of each stud with the help of a pencil.
Step 2: Next take the grab bar and place it at your desired level. You can use the grout line on your tiles to adjust the level.
Step 3: Mark the fixing holes.
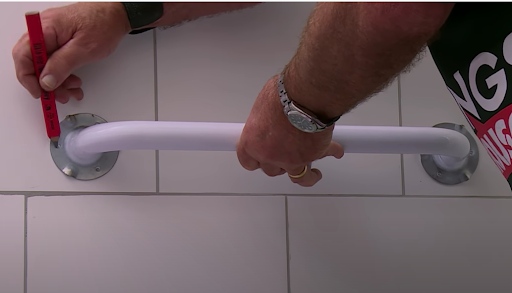
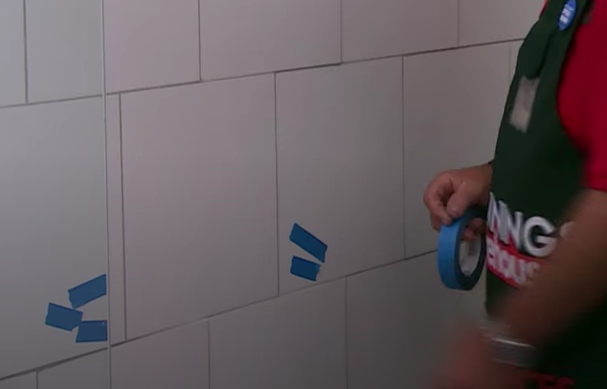
Step 4: Put masking tapes on the mark to not chip the tiles too much as you drill.
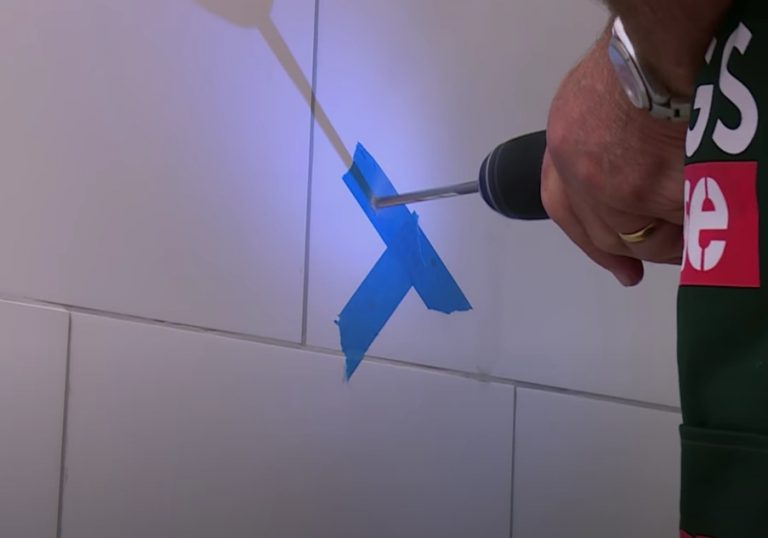
Step 5: Start drilling. Make sure you don’t drill on the grout lines.
Step 6: When done drilling, take the tapes off the wall, put your plugs in, and put the screws into the plugs. In order to put the plugs in, tap them with a hammer and later screw into the plugs. In some cases, a hammer may not be necessary.
Step 7: Now just put your rails up to where the plugs are, locate your screws and later drill them in.
Step 8: Move the cover plates around in place and make sure that they are nice and snug.
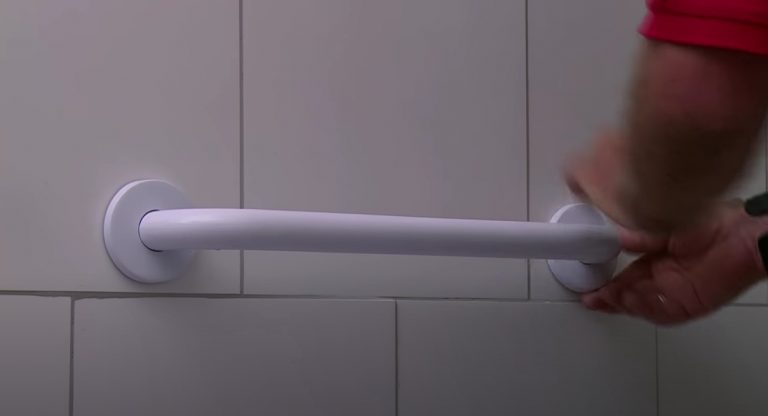
Your grab bar installation is complete.
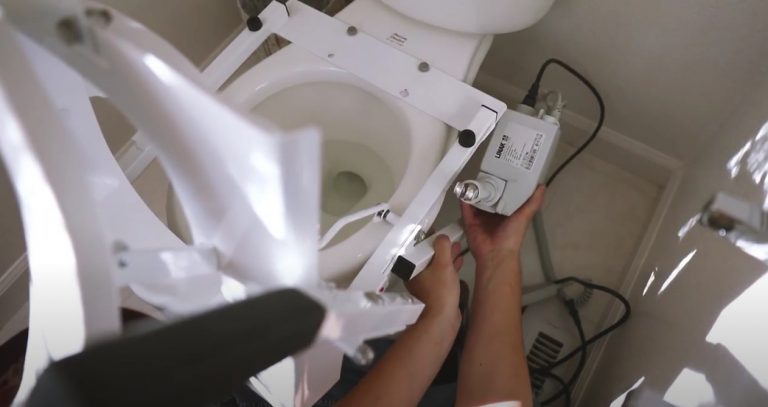
9. Mechanical toilet seat lift with handles
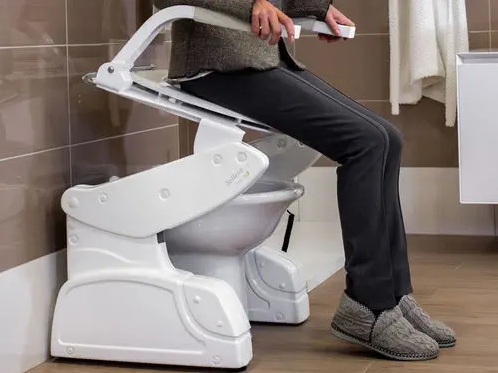
Step 1: Unscrew toilet seat and lid off
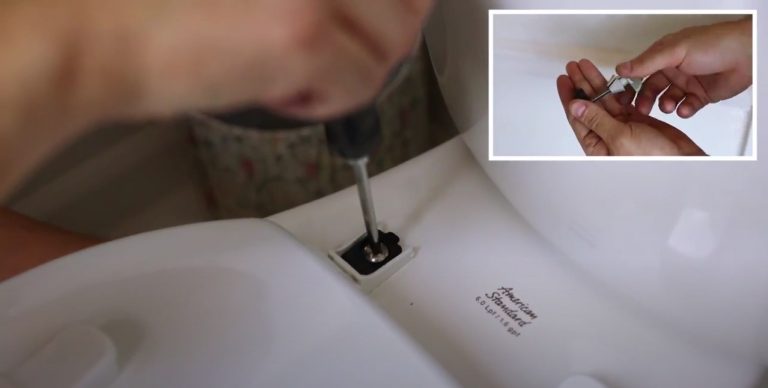
Step 2: Bring the tilt frame and set it on the toilet bowl
Step 3: Secure the frame to the toilet bowl by putting the bolts together through the frame and the toilet bowl. You will need to tighten the nuts from the bottom side of the commode with the help of a wrench.
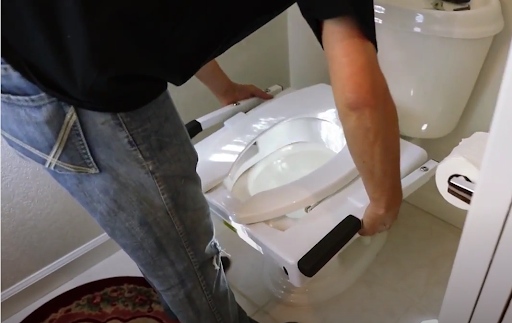
Step 4: To mount the motor, grab the two arms of the arm rests and pull them forward until the seat is slightly extended. This will make space for the motor to be inserted.
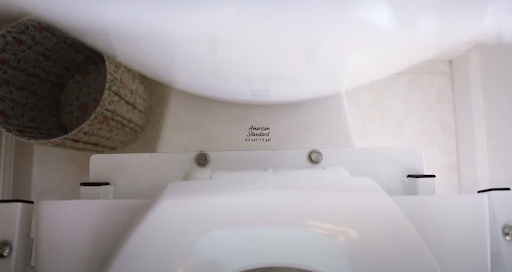
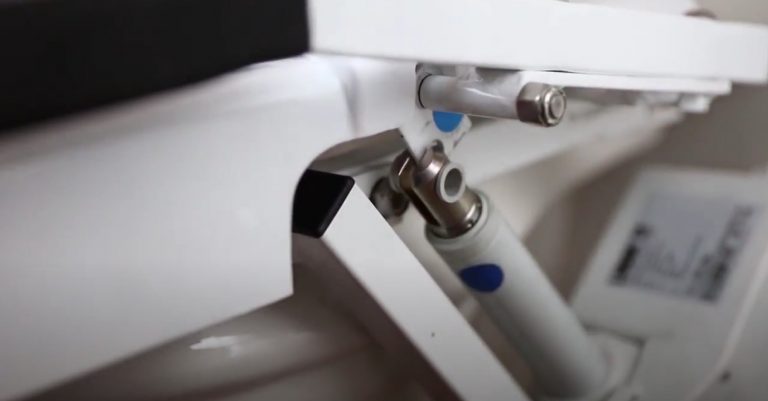
Step 5: Using the red dots as a guide, place the motor mount over the bolt push , push the motor mount down and behind the frame bracket.
Step 6: Make sure the motor bracket rests completely inside the frame bracket using the two blue dots as a guide.
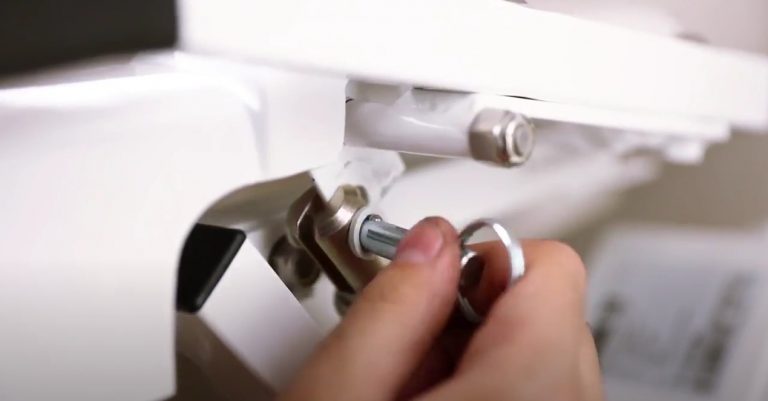
Step 7: Push the seat down to its down position
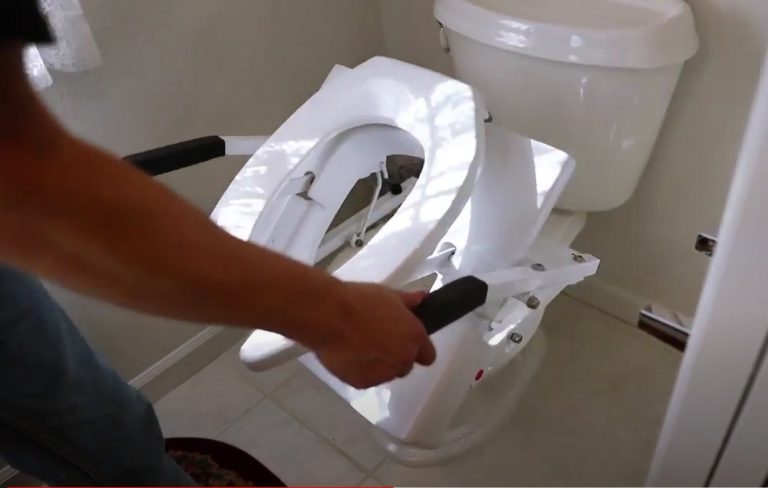
Step 8: Pull the top shaft of the motor and align the motor mount slot over the top frame motor mounting bracket and push in the pin
Step 9: Simply hook the push button control on the arm and plug the unit into a standard wall outlet
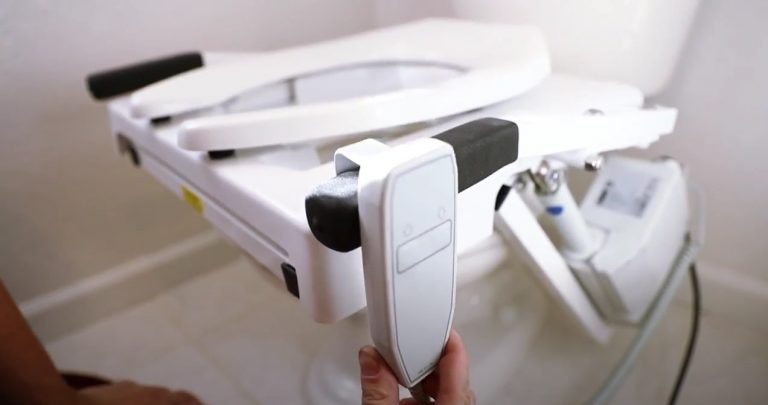
Congrats! You have successfully installed your power tilt toilet seat lift.
Factors to Consider
1. Distance and diameter
- To get a firm grip, keep an ample space of 1 ½ inches between your grab bar and the wall.
- A diameter bar of 1 ¼ inches facilitates a firm grip.
- It’s vital to reach the bar rapidly if someone slips. Therefore, there should be no projecting objects within 12 inches above the grab bar.
2. Position and placement
- You should place the grab bar on the wall nearest to the toilet, usually to your side. If someone is being transferred to their toilet seat from a wheelchair, or just to sit or stand, this placement is fairly convenient.
- Placing a grab bar on the wall that’s behind the toilet helps caregivers aid someone with sitting or standing.
- According to the ADA, it is wise to install grab bars horizontally between 33 and 36 inches (maximum). It should be placed above the finished floor to the top of the gripping surface. This is the most appropriate placement for common use and average height.
3. Structural strength
- A solid grab bar is much safer. Also, grab bars can’t rotate within their fittings.
- Grab bars can hold up about 250 pounds of force when they are properly installed. This helps to support the added level of force someone exerts when they grab the bar hastily while falling.
- Grab bars must be installed primarily where reinforcements exist in the walls, be it mounted or studs or on reinforced walls.
4. Your height
- While installing a grab bar in your bathroom, you must keep in mind your own height as well as the height of others who may need assistance from the grab bars. You must be able to comfortably grab the bar from your toilet in order to sit or stand from your place. A bar placed at the incorrect height likely won’t support or save you from falling.
- An angular or vertically placed bar may be more helpful than a horizontal one. It’s wise to take consultation from an occupational therapist to decide on the most appropriate method and position for you to place your grab bar.
5. Shape of your toilet bowl
- If you are installing a toilet rail fixed to a seat riser, you must confirm that the shape of your desired toilet seat riser model fits the shape of your toilet bowl, be it round or elongated.
6. Your aesthetic preferences
- Don’t worry about aesthetics – modern day grab bars can do their job without ruining your bathroom outlook.
- A huge variety of sleek looking and integrated safety bar options like the zig zag safety bars, crescent bars, premium bent grab bars are available that can enhance the beauty of your toilet besides providing physical safety.
FAQs
Q. Where should toilet grab bars be installed?
According to ADA, grab bars should be placed:
- On the side wall closest to the toilet.
- On the wall behind the toilet
- horizontally between 33 inches and 36 inches maximum above the finished floor to the top of the gripping surface
Q. What is the height of a handicap grab bar?
33 to 36 inches above the finished floor is the required height for both types of bars. Side wall grab bars have to be 42 inches in length. One of its ends must be 12 inches away from the wall behind the toilet and the other at least 54 inches away from that wall. Rear wall needs to be 36 inches long.
Q. How much weight can a grab bar hold?
Usually up to 250 pounds. This helps prevent accidental falls by supporting the user’s weight as they quickly grab the bar while falling.

Leave a Comment