
Showers are certainly not as safe as they seem. Soapy water on the shower floor poses a risk. This is especially true for those with balance problems, like the elderly and children. An accidental fall into the shower could have serious consequences. Even death in the worst case.
So, if the well-being of your loved ones is your biggest concern, you should install grab bars. They provide a stable surface where you can support while you take a shower. Furthermore, they’re durable and resistant to rust.
Installing grab bars is very easy. However, to do it the right way, you should follow the ADA specifications.
How to Install Handicap Grab Bars to Make Your Bathroom ADA Accessible?
-
ADA Specifications
The Americans with Disabilities Act (ADA) is a regulation that guarantees the equal treatment of people with disabilities. All public and commercial facilities in the United States are obliged to meet the ADA standards.
According to the ADA, grab bars should have a minimum length of 42-inch on the side wall and 36-inch on the rear wall. They should be installed 33-36 inches above the ground level and 1.5-inch away from the wall. Also, they should withstand 250 lbs of minimum load with a minimum gripping surface of 1.25 inches.
-
How to choose the right grab bar?
Grab bars should be strong and sturdy. Also, they should be resistant to rust, mold, and mildew. In these cases, stainless steel is the material par excellence. This material withstands high loads and temperature changes without deforming. Furthermore, its smooth surface prevents the accumulation of limescale and other debris.
Steel grab bars are usually 18-32 inches long and 1.5-inches in diameter. Choose the following dimensions according to the position of the bar:
Vertical: 18 inches
Angled: 24 inches
Horizontal: 32 inches
-
Tools and materials for handicap bar installation
To install a grab bar the right way, you should first have the correct tools and materials at hand. Here’s a list of what you’ll need:
- Drill and drill bits
- Rubber hammer
- Wall anchors
- Fasteners
- Silicone adhesive
- Bubble level
-
Choose the right place
Grab bars should be installed in a safe place inside the shower. They should be anchored to the wall studs to guarantee maximum stability and support. Also, they should be located at a suitable height so every family member can easily reach them.
Vertical bars should be installed near the shower door frame or near the shower handles. On the other hand, horizontal bars should go on the side or rear wall of the shower.
You can also install grab bars near handicap toilets, to provide support while sitting or standing. For these purposes, grab bars are usually installed in a vertical or angled position. For example, angled bars facilitate hand sliding while trying to seat. They also help reduce pressure on the wrist.
Angled bars adapt to tall and short people, allowing grabbing the bar at different heights. Unfortunately, in many cases it isn’t possible to install angled grab bars on wall studs. However, wall anchors can solve that problem.
-
Installing a Grab Bar with Studs
- First of all, you should find the studs behind the walls. The fastest way to do this is to use a stud finder. These devices are very accurate and they beep when reaching the center point of the stud. If you don’t have one of these, you can check your home’s blueprints to find the studs
- Mark the location of the edges of each stud on the walls, using a marker
- Then, use masking tape to extend the marks of the edges to the place where the grab bar will be installed
- Put the grab bar in place, so that at least two mounting holes are aligned with the center line of each stud. Then, mark the points where the mounting holes touch the shower wall
- After that, drill the wall at each of the marked points. In case of not drilling a stud, use the stud finder and make the necessary corrections
- Apply silicone adhesive around the mounting flanges of the grab bar. Make sure to apply enough adhesive to get the best results
- Fix the grab bar to the shower wall using stainless-steel screws. Make sure the screws penetrate at least 1-inch into the stud
- Finally, pull the grab bar as hard as you can. If it doesn’t move, you did a good job
-
Installing a Grab Bar without Studs
- First of all, put the grab bar in place. Then mark the points where the mounting holes touch the shower wall
- Cover the marks on the wall with masking tape. This will prevent the tiles from breaking during the drilling process
- Then, drill the wall in each of the marked points
- Insert the first wall anchor into any hole. While you do it, hold the metal channel in vertical position
- Now pull the plastic cap when the metal channel extends to the other side of the wall. Repeat the same procedure with the rest of the holes
- Apply silicone adhesive to the edges of the mounting flanges
- Fix the grab bar to the shower wall using the screws included with the wall anchors. Tighten the screws until the grab bar remains static on the wall
- Finally, pull the bar as hard as you can to verify the stability
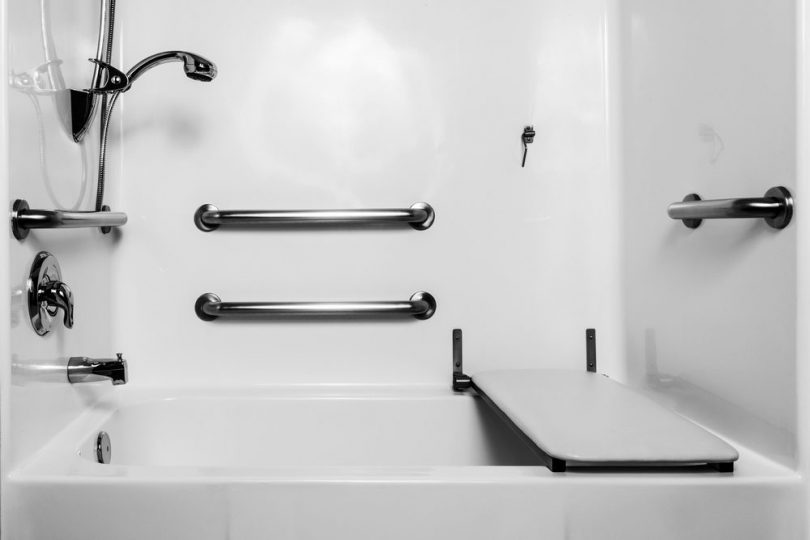
How to Place Grab Bars on Bathtub/Shower Combination?
In the case of bathtub/shower combinations, follow these suggestions:
- Install horizontal bars on the side wall of the bathtub/shower. The bar should be longer than 30 inches
- Install vertical bars near the faucet handles and on the wall opposite to the handles
Useful Tips
- When drilling tiled surfaces, don’t use regular twist drill bits because they’ll break very easily. Better use glass-tile drill bits 0.25-inch in diameter to drill studs or 0.5-inch in diameter to install wall anchors
- Never install grab bars on acrylic or drywall surfaces
- If a family member has weak hands, he/she will probably have trouble to grab the bar. In such cases, it isn’t convenient to choose too thick bar
- Some bars can only be installed in certain positions. So, check this in the user manual before starting the installation
Summary
As you can see, you don’t need to be an expert to know how to install a handicap grab bar yourself. First find the right drill bit depending on the type of material to be drilled. Use a professional stud finder so you don’t waste too much time looking for wall studs. Above all, make sure to meet each of the ADA specifications.
Install the grab bar at a safe height where all of your family members can grab it without problems. If you follow each of the tips in this guide, you won’t need to pay a professional to install the grab bars in your home.
FAQs
Q. 1: What is the average installation cost of grab bars?
Ans. Usually, the average installation cost of a single grab bar is $100-$180.
Q. 2: Can I install grab bars on any surface?
Ans. No, it isn’t recommended to install grab bars directly on acrylic, drywall, or any other weak surface.

Leave a Comment