
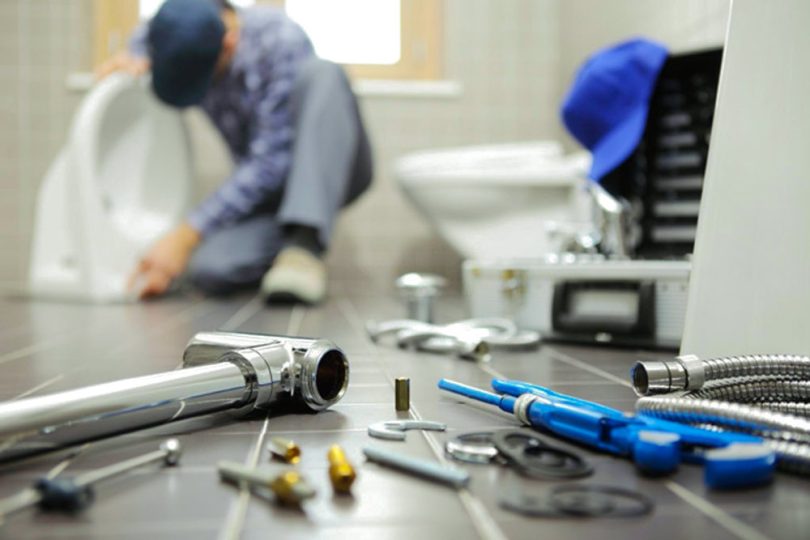
Most people have had the experience of using a toilet that doesn’t flush well. If this is the case with your toilet, there are some things that you can do to remedy the problem.
Nobody wants to have to wait in the bathroom until the toilet finishes filling so that they can flush it again. Talk about embarrassing!
Luckily, there are some home remedies that can improve the strength of your flush.
Why Is a Strong Flush Important?
A powerful flush is important because it keeps your toilet more clean and sanitary while saving water. Nobody wants to have to pay for twice the water bill than they would have if their toilet flushed properly the first time.
How to Make a Toilet Flush Better? | Possible Issues & Their Solutions
Possibility 1: Clogged waste pipe
To find out if your waste pipe is clogged, simply take a bucket of water and pour it down the toilet rapidly. If the water goes down, the toilet isn’t clogged, but if it doesn’t, you’ll want to have your plunger handy.
Nobody wants to clean up the giant mess of a toilet that has overflowed. If the problem is that your waste pipe is clogged, then you can fix this with a plunger or a snake.
Possibility 2: Clogged jet flush hole
Sometimes, organic debris and mineral deposits from hard water or not cleaning your toilet enough accumulate in the siphon jet hole.
Siphonic jet toilets have an Inverted-P trap or an S-shaped way. On the one end, it connects to your home plumbing, and the other attaches to the toilet bowl inlet.
When the toilet is working correctly, the trap design creates a siphon that propels the waste down the tubes. These toilets usually perform with the water level above the bowl outlet, creating a larger surface area for water.
When you look under the rim of the front of the toilet, you’ll see a molded pocket, which is called the siphon jet. This holds the extra water.
This jet will be pointed at the trapway so that the water will get pulled out of the pocket by the force of the vacuum.
When the flush lever is pushed down on these powerful toilets, water is sent forcefully by the cistern. The water level will rise briefly, and then go down the jet hole quickly, pulling any waste matter with it.
If the jet hole is clogged, the water will simply go straight down or sputter around without the powerful swirling motion that happens when it is working properly.
Another way you can know if your jet hole is clogged is if it takes much longer for the water to drain than usual, and seems sluggish to empty when flushed. This happens when the jets are not releasing water that is pressurized enough.
If you are seeing dark orange or black discoloration around the jet hole, these are bacterial deposits causing the clog. If they are white or rust-colored, the clog is a hard water mineral deposit problem.
Solution
- Whatever is causing the clog, get all of the water out of the bowl before cleaning it so your efforts won’t be wasted or washed away.
- Turn off the water valve that supplies the toilet and flush it, which will empty the bowl.
- Make a paste out of vinegar and baking soda, and apply it to the discolored areas, letting it sit for 30 minutes, trying to get the paste as far into the jets as possible.
- After half an hour, use a scrub brush to clean away the debris, and repeat if necessary for stubborn stains, being careful not to crack the porcelain.
- Apply a toilet bowl cleaning detergent or bleach to the area, letting it sit for 15 minutes before scrubbing off.
- Now turn the water back on and flush.
Possibility 3: Clogged rim jets
Solution: Clogs can also happen with the small openings found underneath the rim of the toilet bowl.
To determine if this is the case, get some rubber gloves and put a small mirror, like a compact mirror, under the rim of the toilet bowl so see whether or not there are signs of clogged jet holes on the underneath around the rim of the toilet.
Then, using an undone wire metal hanger or another thin wire, scrape off the junk surrounding the jet hole. You’ll have to repeat this all the way around the bowl until all of the jets are cleaned out.
Possibility 4: The water level in the tank is too low
Problem:
If the water line isn’t reaching the designated line on the inside of the toilet tank, you have too little water to get a good flush.
Solution:
Use the toilet tank float assembly inside your water tank to adjust the water line so that it reaches an appropriate level.
Possibility 5: The water level in the bowl is low
Problem:
If the water in the actual toilet bowl is too low, there can be a few problems causing this, one of which is that the fill tube might have had some damage or it isn’t correctly positioned.
Solution:
In order to get the toilet bowl to fill correctly, first check the inside of the tank to see what the proper water level there is. In most tanks, it is between one and two inches below the overflow tube and fill valve.
Often, resetting the float to the proper level will also adjust the level of the water in the bowl. If your toilet has a ball float, look for the adjustment dials or screws to raise the arm.
If it has a cylinder float, you can slide the float up by the float clip that releases the float. However, if none of these solutions work, and there are no clogs in the rim jets, you may have a crack in the actual toilet bowl, and for this, the only solution is to replace it.
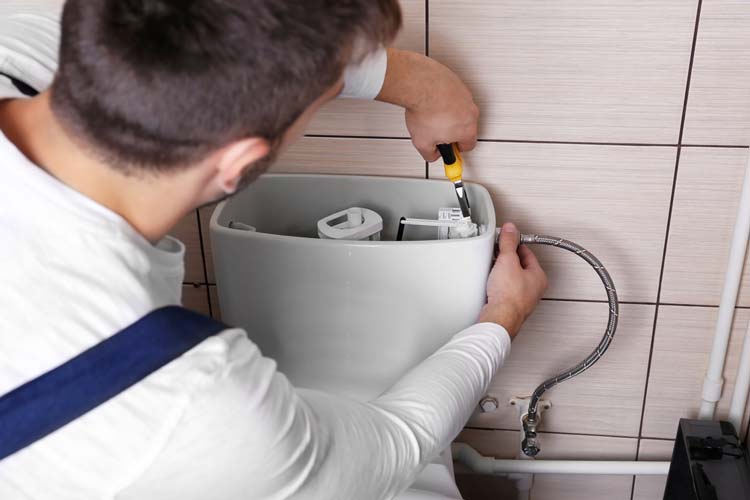
Possibility 6: Flapper Valve Has Too Much Slack
Problem:
If you look inside the toilet tank to the bottom, there is a chain connecting the flush handle to the covering that opens and closes to let the water in and out, which is known as the flapper.
The chain should only have a small amount of play, or slack. If it has too much, the flapper won’t raise up the entire way when the flushing handle is pushed.
Solution:
First, turn off the water shut off valve, usually located underneath the toilet tank where the plumbing connects to the wall.
After the water if off, unhook the pin that is located at the very end of the handle bar. You’ll need to relocate the pin a few links closer on the chain to the flapper, which will make it shorter.
To test it out, reinstall the pin where it was formerly located on the end of the handle, then turn the water shut off valve to let the tank refill with water.
If it didn’t work, you might have to do the procedure over again, moving the pin even closer to the flapper.
If none of this works, try to inspect how the flapper is attached to the tank. It will have either a ring attachment or ears on either side of the tube that is standing upright in the toilet.
If you see the small ears sticking out from the flapper’s collar, which is designed to hold the flapper in place, as well as a ring, simply remove the ring and use only the ears, and then test it again.
Possibility 7: Problems with the Plumbing Vent System
Problem:
The extensive plumbing vent system that you can’t see, which is located behind the wall, are known as the vent pipes. These pipes open into the air at rooftop level, keeping unpleasant odors out of your house.
If you can hear bubbling and gurgling noises and slow drainage, it’s a good indicator that the venting system is clogged. Another indicator is if your toilet is emitting air that smells like sewage.
Solution:
For this fix, you’ll need to climb up on the roof and locate your vent pipe, which is usually either a PVC pipe or made of cast iron, which is black. The pipe will be about three inches in diameter.
Use a screwdriver and remove the cap on the vent, and listen inside the pipe for a draining sound when a helper flushes the toilet to ensure that you have the correct pipe.
At this point, if you can see the debris, simply remove it. Common blockages are caused by leaves, other organic matter, or even dead animals that got trapped in the pipe.
If you can’t locate where the debris is, take your garden hose and set it to Jet, and use a full spray to attempt to remove it.
If the problem still persists, get a plumber’s auger, where you use the cable to find the debris. When you come up against the blockage, turn the handle so that it pushes the head through the clog.
When you succeed, you’ll know it by the water draining out. Then remove the cable. You’ll want to spray more water from the garden hose into the pipe for good measure to be sure that you got the entire blockage.
Possibility 8: You Displaced Water in the Tank to Save Money
Problem:
If you previously put a brick or another heavy object beneath the toilet tank to save on the water bill by reducing your Gallons Per Flush (GPM), this can affect how efficiently the toilet works.
Solution:
In this case, it is wise to remove any object from the toilet tank to get a stronger flush. If you still want to save water, you might consider switching to a low-flow toilet.
Possibility 9: Damaged Overflow Tube
Problem:
If your overflow tube has snapped right off, you’ll need some new parts and some tools to replace it. Look online or in your local hardware store for a toilet repair kit for this job.
Solution:
Rotate the water shut off valve clockwise, and then flush the toilet and drain the water. Now remove the lid of the toilet tank and store it safely.
If you’re still seeing water in the tank, just lift the chain to the flapper to drain it, then soak up the rest of the water with a sponge or some rags.
Get pliers and remove the coupling nut underneath the toilet tank. Here the water feeds the supply line. It also fills the tank. Note: If the line is made of rubber or plastic, replace it with a braided metal line.
Next, place a bucket under the water supply line and slowly detach the line from the fill valve.
Then, unhook the chain away from the lever bar rod that is inside the tank.
Hold the flaps that are on each side of the rubber gasket and take the gasket out.
Next, detach the water refill hose from your overflow tube. You’ll do this by slipping the anchor hook upward and off of the overflow tube.
Use a flat-headed screwdriver to loosen the bolts that are located on the flappers both sides.
Once the wing nut is removed, raise the tank carefully off of the toilet bowl. Keep in mind that this is heavy, so you may need assistance from your helper.
Then, wearing gloves, remove the gasket that is located in the middle beneath the tank, which is usually made of rubber.
Next, remove the double bolts that were holding the toilet tank onto the base with either a crescent wrench or a pair of pliers.
Remove the washer and nut associated with the bolts.
Then you’ll need to loosen the big plastic hexagon-shaped nut that is located under where the gasket was, and remove the associated nut.
Finally, you can take out the overflow tube with its entire flapper assembly from the tank.
This is a great time to consider cleaning out your toilet tank.
Then, to begin to put the toilet back together, first get the new flapper assembly and overflow, and insert it into the tank. Make sure that it is flush with the bottom of the tank. Use a level and set it up to the indicator line on the fill valve, and then use a marker to mark the tube at a position one inch lower than the mark that is already over the fill valve.
Use a saw to cut off the top side of your overflow tube. You might consider sanding off the rough edges.
Next, place your flush valve (flapper assembly and overflow tube) inside the tank.
Take your hex nut and thread it onto your overflow tube’s bottom. You can hand-tighten this, being careful not to break it.
Then place the newer rubber gasket over the hexagonal nut.
Next, place the 2 new bolts from your kit into your tank, and place the rubber washer immediately below the bolt head.
Next, from the underside of the tank, pass through the metal washer and nut onto both bolts.
Being very careful not to over-tighten and crack your tank, gently use a crescent wrench to tighten the nut.
Next, being careful and using help if necessary, replace the toilet tank back on the base, being sure to line up the holes on the toilet with your bolts.
Use a level to make sure the top of the tank is level.
Then thread first the rubber washer, then the metal washer, and lastly the new wing nut onto the bolt, screwing them down to the bottom.
Then fasten the flapper chain onto the lever rod, making sure that there is some slack in the chain.
Next, connect the water refill hose onto the overflow tube by descending the anchor clip onto the overflow tube.
Then reattach the water supply line.
Next, turn the lever to turn back on the water supply, which will refill the tank. Flush the toilet, making sure the flapper is closing all the way. If it is, replace the tank lid and voila, you have a perfectly function al toilet!
How to Make a Toilet Flush Better?
1. Check the toilet tank fill line level
The weight and speed of the water moving from the tank to the bowl is what’s doing most of the flushing action.
So, you’ll want the water to be about a half an inch from your flush valve, and your flush valve should be about an inch below the hole for the handle.
The next thing that you can check out is how much slack is in the chain, if you have a flap-style flush valve. There should only be about a quarter of an inch of slack, which will open the flap the best.
Also, check the relationship of the chain on your lever, you don’t want this at an angle, where it’s not opening very wide.
You’ll want to adjust your chain so that when you pull your lever, it’ll open as wide as it can. If you have a flap style, you can also purchase an adjustable flap, and you can adjust this so it stays open longer.
If you have a flap with a float above it, you’d want to adjust that float down closer to the flap, and it’s going to stay open longer.
If you have a canister style without a flap, there’s really no adjustment you can make—it’s set by the manufacturer.
The one thing you can do is just hold the lever down longer, and that will allow a lot more water to flow into the bowl to get a better flush.
2. Clean out your toilet using bleach
Start cleaning your toilet with the bowl first, coating the entire toilet bowl by starting under the rim with a toilet cleaning product that contains bleach.
Then, scrub your toilet bowl with a toilet brush to get the solution into it, scrubbing everything, including the toilet bend if possible.
Now, let the solution sit for five minutes before flushing the toilet. If you don’t have toilet detergent cleaner with bleach, just use a half a cup of plain bleach instead, using the same method.
3. Clean out your toilet using vinegar/baking soda
In order to use baking soda and vinegar to clean your toilet, sprinkle an entire cup of baking soda into the bowl, and then pour one cup of white vinegar into the toilet.
Put the lid of the toilet down and let the solution sit for half an hour. After 30 minutes, scrub the toilet bowl, and then flush. These ingredients are plumbing-safe.
4. Change your old toilet
To complete this project, you’ll need rubber gloves, a new wax ring, a new supply line, a hack saw, a putty knife, two adjustable wrenches, a plunger, some old rags, a sponge, and a bucket.
First, turn off the water at the shutoff valve. Now, flush the toilet to drain the water from the toilet bowl and the tank. Use a plunger to force the remaining water down the drain line. If there is still water remaining, remove it with your sponge and bucket.
Disconnect the water supply line with an adjustable wrench. Now you’re ready to unbolt and remove the old toilet.
If you’re working alone, it may be easier to separate the tank from the bowl first. If the nuts are rusted, you may need to cut them off with a hack saw.
Gently rock the toilet back and forth until you can lift the old toilet free.
Use a putty knife and remove old wax seal and use your rags to clean up the area. Stuff a rag into the hole to prevent sewer gases from backing up and to prevent tools from falling into the hole.
Inspect the flange for cracks. If it is in good shape, you’re ready to put the new toilet back in place.
With the toilet resting on its side on a padded surface, place the new wax ring on it and pop the bolts into the flange. You may need help after you remove the rag, to place the new toilet onto the flange, lining up the bolts.
Press down to seat the toilet onto the wax ring, then place a plastic cap base, washer and nut onto each bolt to secure the toilet, and tighten the nuts. If the bolts extend too far, cut off the excess with a hack saw.
Now install the tank to bowl gasket on the base of the tank, and insert the bolts and washers from inside the tank. Place the tank onto the bowl, aligning the shank of the bolts with the bowl.
Alternating sides, tighten each nut until the tank comes into contact with the bowl. Pop the trim caps in place to cover the new bolts, and secure the new seat onto the bowl with mounting bolts.
Connect the water supply line to the bottom of the tank, and turn back on the supply valve. You’re done!
5. Try soap and water
Use some extremely hot tap water, fill a bucket, and pour the hot water into the bowl. Then take some dish soap and squirt a couple of ounces into the bowl.
Then wait for it to float down to the bottom, and pour another bucket of hot water into the bowl.
This should fix your clogged toilet. If it doesn’t, repeat the process.

Leave a Comment