
Tiles look great on shower walls. However, they have a big problem. Mold and mildew tend to proliferate on the grout joints. For that reason, tiled shower walls should remain dry all the time to prevent those ugly black mold stains.
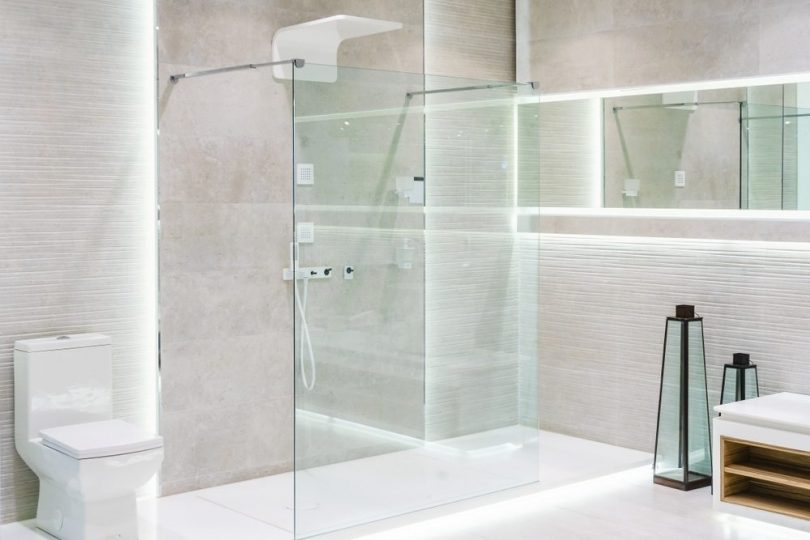
However, there are many other alternatives to tiled shower walls. For example, DIY shower wall panels. They can be custom built to completely cover every shower wall. Best of all, they don’t have joints where pathogens tend to accumulate over time.
If you’ve never heard about shower panels before and want to learn more about them, you’re in the right place. Today, we’ll show you how to install a shower panel like a pro. You’ll also know why it’s a good idea to prefer shower panels instead of tiles.
How to Install a Shower Panel?
1. Choose the right panel for you
Before beginning the installation process, make sure the shower valve has been installed rightly, or else the whole panel would have to put down after installation. Next, you should find the most appropriate kind of panel for your bathroom. Plain colors and patterns are among the most popular options. Some models are decorated with famous paintings that turn your shower into an art gallery.
Most shower panels are made of acrylic. This material is shiny and translucent like glass, but much safer. It has superior impact resistance and is very light. Also, it doesn’t produce sharp edges when broken.
2. Read the instructions
Usually, shower panels include a complete installation kit with the required fasteners and instructions manual. Before starting the installation, take a look at the manual and check that all the parts of the installation kit are complete.
Here’s a list with all the common items included in most installation kits:
- Tile spacers
- Silicone sealer
- Sand paper
- Foam tape roll
- Fitting guide
3. Use the right tools
In addition to the materials included on the installation kit, you’ll need extra tools and protective equipment to get the job done. Here’s a list with all of them:
- Reciprocating saw
- Drill
- Utility knife
- Masking tape
- Measuring tape
- Caulking gun
- Protective glasses
- Face mask
4. Installation
- Measure the width and height of each of the perimeter walls of the shower with the measuring tape
- Then, place the panel on a flat surface. Mark the cutting lines on the panel, based on the measurements you made on the walls. Cover the edges of the panel with masking tape to prevent breakage during the cutting process
- After that, cut the panels to the required length using a reciprocating saw. Make sure to wear a face mask and protective lenses at this point
- Sand the imperfections on the cut edges with 100-grit sandpaper. Also, sand the edges where the panels will be joined. This will improve the adhesion of the glue, creating a stronger bond.
- Install chrome trims around the cut edges to improve aesthetics. To do this you’ll need a drill and some screws
- Repeat steps 2-5 with the rest of the panels
- Stick corner trim pieces in each corner of the shower cubicle using silicone sealant. Also stick tile spacers on the shower walls, where the panels are going to be installed. Doing this will leave enough space behind the panels to apply the sealant
- Now stick 3 foam tape strips behind the first panel to be installed. Then, apply enough silicone sealant on the surface and the borders of the panel
- Push the face with sealant against the wall, making sure the borders of the panel fit between the corner trims. Apply enough pressure to guarantee a strong bond
- Repeat steps 8-9 with the rest of the panels
- Finally, apply more silicone sealant to the joints between panels to prevent water from penetrating through them
Shower Panels vs Tiles – Which is Better?

Undoubtedly, tiles are the preferred option for covering shower walls. Tiles are highly resistant to impacts and high temperatures. Also, you can clean them with harsh chemicals and abrasive cleaning tools without risks.
However, installing tile walls is a time consuming labor. You’ll require several days to prepare the working area, mix the mortar, install the tiles and wait for it to dry.
Also, mold, mildew and other pathogens tend to accumulate in tile pores and between the grout joints. For this reason, tile shower walls require frequent maintenance in order to prevent stubborn stains.
On the other hand, a shower panel system is inexpensive, lightweight, and easy to install. They are resistant to high impacts and UV rays. However, they’re prone to scratches and can’t be cleaned with harsh chemicals and abrasive cleaning tools.
However, they’re very easy to clean and you don’t need to scrub too much to get good results. Its smooth surface prevents mold, mildew and other pathogens from accumulating on the surface. However, like tile shower walls, it’s recommended to keep them dry to prevent staining.
Best of all, you don’t need to be an expert to install shower panels. Most models on the market include easy-to-understand instructions and a complete installation kit. Also, you won’t need help from someone else to complete the installation.
Conclusion
As you can see, installing shower panels isn’t that difficult. You just need the right tools and details instructions. Hopefully, today’s DIY guide will help you learn how to install a shower panel.
However, if you don’t feel comfortable during it, ask for professional help. Make sure to fill all joints with silicone sealant during installation to avoid water leaks. Also, keep a frequent maintenance routine to extend the lifespan of your panels.
FAQs
1. What is the average price to install shower panels?
Ans. The average price of installing shower panels is $800-$1000. It all depends on the size of the shower and the quality of the materials.
2. Can shower panels be installed over tiles?
Ans. Yes, that’s possible but isn’t recommended because the tiles and the panels would take up too much space in the shower cubicle.

Leave a Comment