
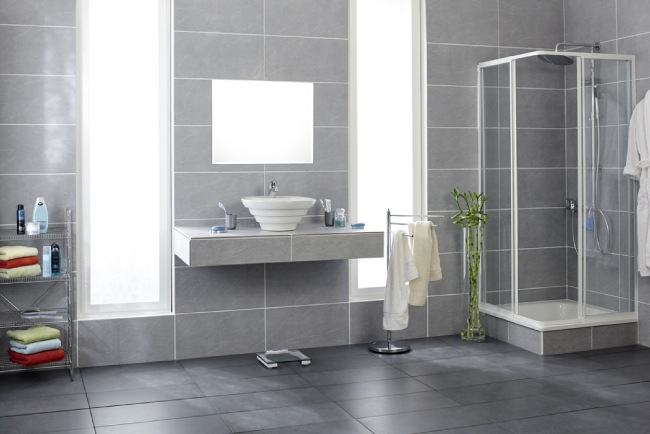
A bathroom floor tile that is ceramic or stone is unbeatable for durability and appearance, whether you are replacing an old floor or installing a new one. It is virtually a maintenance-free floor covering when laid properly. A variety of textures and colors are available.
In addition to the tremendous appeal of laying a tile floor yourself, you can often save $500 to $1,500 by doing it yourself. If you feel comfortable using a few hand tools and are willing to take the time and patience to align the tiles perfectly, then the job can be done DIY style.
Here we will show you how!
Remove the Old Tile Floor
Tools Needed
- Hammer
- Pry bar
- Long-handled floor scraper
- Chisel or air hammer with a chisel set
- Scraper
Step 1: Remove free-standing items
Try and remove everything from the room that is on the floor. This can include free-standing mirrors, washing baskets, floor rugs, and mats.
Take off any baseboard trim
First, find the edge of the baseboard trim and start prying it up from the floor. Be careful not to damage it, as this will be your guide for where to put the new baseboard trim.
Once you have lifted up the baseboard trim, use a pry bar or crowbar place it under one of the floor tile edges, and slowly lift up on it until it pops out from under any nails holding it in place.
Seal the vents
It is important to seal the vents before removing floor tiles. This is because the air pressure in the room will push out any dust or debris. The air pressure can also cause a mess if it’s not sealed off with duct tape or other materials.
Cover what you can’t move
The tiles are not only glued to the subfloor but often glued to each other. Cover what you can’t move before removing the tile by securing the perimeter of all the furniture and covering it to protect it. Secure any wires or cables that may get in your way.
Step 2: Locate or create a starting point
The next step is locating the starting point. If there are no walls that are close to the edge of the tile, then start by measuring from a wall or doorway. If you have a wall that is close to the edge of the tile, measure from that wall instead.
Step 3: Remove tile
The best tool for the job is the crowbar. This tool will help you remove tiles without breaking them or damaging the flooring underneath. For smaller tiles, use an ice pick to lift them up and then pull them out.
Step 4: Access underlayment
You just need to remove the tile and then place it on the ground. However, there are some cases where you might need to access the underlayment after removing the floor tile.
If you have removed an adhesive tile with a layer of vinyl or linoleum below it, you will need to use a razor blade or utility knife and cut around the perimeter of each piece.
Step 5: Clear debris
After removing the tile, you need to clear away any debris that may have been left behind during removal.
Step 6: Remove exposed nails
It is important to remove exposed nails as they can cause injury and cuts when they are stood on.
Step 7: Inspect the floor
After removing the floor tile, inspect the subfloor carefully for any damage. You may need to replace the subfloor before you can install new flooring.
- Check for rot or mold
- Check for signs of water leakage
- Look for any signs of termite infestation
Before You Tile a Bathroom Floor
Estimate the cost of a tile project
- Vinyl floor tiles are $30–$100 per square meter
- Porcelain or ceramic are $50–$150 per square meter
- Natural stone tiles are $90–$125 per square meter
You will need to allow extra labor and costs of other tools needed if you are doing the job yourself.
Things you need to tile a bathroom floor
Tools
- Tile cutter
- Mallet
- Level
- Tile spaces
- Thin-set mortar
- Hammer
- Pry bar
- Long-handled floor scraper
Materials
- Mortar
- Tile adhesive
- Grout
How to Tile a Bathroom Floor: Step-by-Step?
Step 1. Keep the floor clean
Prepare the bathroom floor for tiling before you begin working on the tile. Start by clearing your floors of dust and debris.
Step 2. Lay down your WonderBoard
Whenever bathroom floor tiles are laid, a concrete backer is laid as the bottom layer. I just want to clarify that you cannot simply put tile floors over plywood subfloors in the bathroom. It doesn’t work well with tiles because plywood expands and contracts like anything made with wood.
You will need to get some concrete backer boarding down first before your floor tiles. To prepare for installing tile, it was necessary to lay 1/4? WonderBoard directly over the subfloor.
Wonderboard comes in two sizes, 1/4? and 7/16?. You can use the 1/4? for the floors and the 7/16? for your walls. Lay down the backer boards directly on top of thin-set mortar using a 1/4? square notched trowel.
Now you need to secure the cement boards with the right cement screws into the floor, making sure they are 6 inches spaced apart. Drive them until you have an even and level look with the board. You don’t want them to be countersunk.
Step 3. Set up the placement of the tiles
Make a slightspot on the floor where the middle lies between two walls. With the other walls, do the same. This gives you the central point for the room where you can start the tiles from.
A long, straight run of tile looks the best. Therefore, measure the distance between the longest wall and the midpoint. That’s the measurement you need to take and mark it down on the longest wall with a chalk line.
Make an x with chalk lines on your floor by repeating this with a perpendicular wall. The first tile goes here to ensure everything around is square.
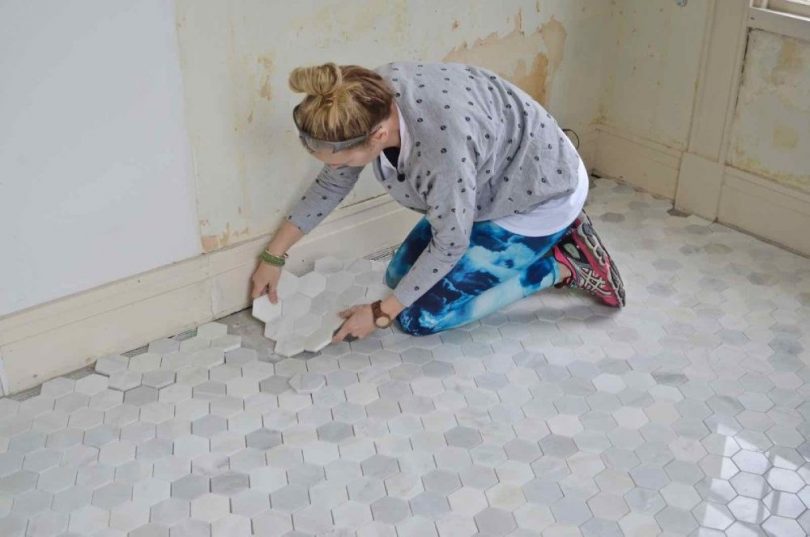
Step 4. Lay out your tiles
Starting with the mark you made earlier, lay the bathroom tiles across the line. Work from one end to the other. Be sure to adjust grout lines based on traffic, and make sure there are no small cuts in the tiles.
It is recommended that you make all the cuts first if you are on your own. This procedure is referred to as dry fitting. When you are doing it alone, it will be too difficult to measure, cut, and apply mortar as you go.
Step 5. Cut pieces on the edging
Use a wet tile saw to cut out any edge pieces
Step 6. Mix up your mortar
You want your mortar consistency to represent thick peanut butter.
Make sure the mortar is properly mixed by following the instructions on it. Have a sponge and bucket of fresh, clean water to clean the tiles and mortar as you go along.
Step 7. Lay the floor tiles
After mixing mortar, cutting the tiles, and laying them out, you are ready to begin installing floor tiles. Lay the mortar with a corrugated trowel held at a 45-degree angle after removing the tile where your chalk cross is.
You can use your chalk lines to ensure that your first piece is perfectly square. If you make a mistake here, you are going to notice it later on.
Don’t lay enough mortar for too many as it dries quickly. Layout enough for 2-4 feet each time.
Press the floor tile gently into the mortar, then slowly twist, which will force out air bubbles. When it’s time to set your tiles, aim to put them as near to the next tile as you can.
You then add the use adjusters and spacer so you get a constricted fit. Use your level and mallet to ensure you are smoothing out the ends of your tiles to the one’s next door.
Step 8. Before grouting, wait for 24 hours
Do not allow anyone to go into the room for a full 24 hours while everything is set in place and drying.
Step 9. Adding in the grout
Start glopping the grout onto the tiles as soon as you have mixed it up.
Use a rubber grout float set around 45 degrees to spread the grout over the tiles as you glide over, making sure you push it into the gaps between the tiles.
Fill all the joints in with grout.
Step 10. Wash the surface of the tiles
If none of the above methods work to remove the stains, you can also renew the grout instead of changing the entire grout.
Adding a layer of color or coating to the grout can protect it from future staining and extend its lifespan.
Waterproofing Your Bathroom
It makes sense to hire a professional to waterproof a bathroom before you tile it. If you want to try it yourself, it is easy. Just follow the steps beneath.
Step 1. Use Neutral Core Silicone Sealer to seal all internal corners once your surfaces have been primed. Smooth the bead with your finger.
Step 2. apply the butanol tape right along with the corners of the shower and along with the flushing, which will stop water from getting in behind the grain.
Step 3. Use a roller to apply the waterproofer to the entire floor and wall surfaces. The whole wet area needs to be properly waterproofed.
Step 4. Apply a second coat of waterproof membrane only after waiting for the first coat to dry completely. The best idea is to apply the second coat at a 90-degree angle.
Step 5. The membrane needs at least 24 hours to dry completely before you start tiling.
What Not To Do
Laminate floors
Laminate flooring can be slippery when it is wet and can warp with exposure to excessive moisture.
Hardwood floors
A hardwood floor can warp in moist areas, and most warranties won’t cover them when installed in moisture areas such as bathrooms. They are also the most expensive type of flooring.
Carpet
When the carpet has been exposed to excessive moisture, it can grow mold and rot. Standing on the carpet with wet feet will eventually cause stains on the carpet.
Why You Should Tile the Wall First
What are the benefits of tiling the wall first? The process is faster. According to many tilers, at least.
The last row of wall tile and the floor tile may therefore have a small gap between them to accommodate the flooring tile. Some people prefer to use a ledger to show where the missing row needs to be.
You can fill the gap with grout. You can also cut the tile, which can be used to fill in the gap between the wall ad floor. It’s not just ugly when tiles aren’t trimmed correctly, or there’s too much grout. Your waterproofing may also be compromised.
Why You Should Tile the Floor First
This will give your wall a more polished appearance. Wall tiles will sit on the floor tiles if you tile the floor first.
As a general rule, wall tiles should always occupy the area above ground tiles. The only way to achieve this is to install the ground tiles first.
You will also have a beautiful finish if you tile the floors first. Your shower will also be water repellent when tiled. As a result, gravity continually causes water and moisture to drip from walls to floors.
Tips To Remove Old Bathroom Tiles
- Safety goggles and gloves are necessary because tile shards can fly everywhere
- soak old tile adhesive in acetone for easy removal
Tips to tile a bathroom floor
- Don’t go mosaic style as you will have more grout lines to clean
- Take the toilet out instead of tiling around it
- Think of the shape, pattern, and style first
Tips for Bathroom Tile Maintenance
Tools
- A medium bristle brush
- A damp sponge or cloth
- A cleaning solvent
Grout renewal for permanent stains
You can also do grout renewal instead of changing the entire grout when any of the above does not work to remove the stains.
Grout can be protected against future staining and extended for quite a few years with products that add a layer of color and coating.
For seriously stained grout
For grout that is seriously stained, removal and re-applying the grout is the best bet. If the grout is white, you can use whitening products.
Weekly deep cleaning
Giving your tiles a weekly deep cleaning is a good idea to keep stains to a minimum. Hot water and a disinfectant cleaner are all you need. You can also use steamer cleaners.
Everyday cleaning routine
If you see a mark on the grout or tiles, clean this as soon as you see it. This can help avoid staining and easier cleaning before it sets in.

Leave a Comment