
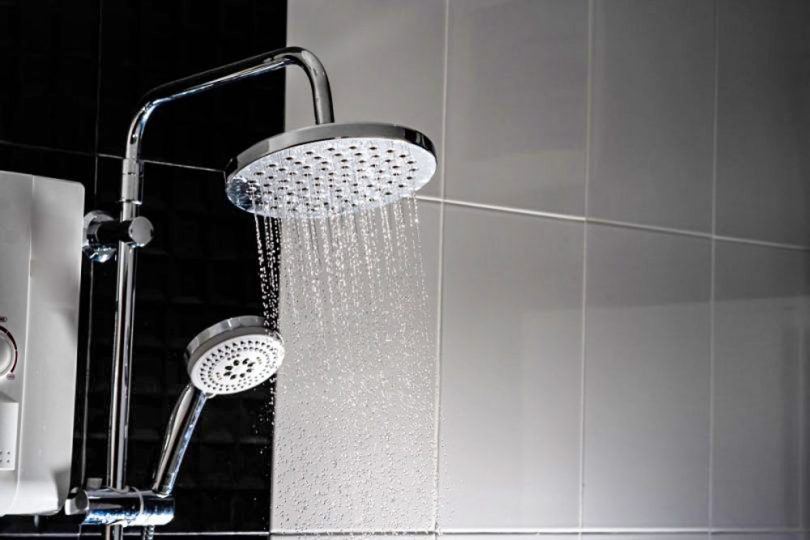
The rainfall shower, which is popularly known as the rain shower head, is an excellent alternative to most conventional shower heads. If properly installed, the Shower creates a gentle fall of water to wash the body in the form of flowing rainfall.
The best rainfall shower goes beyond being gentle on the skin; the shower head appears to be an excellent investment worth the price due to the benefits and value it will add in your bathroom.
The good news is, aside from being a budget-friendly investment, the shower head is simple to install too. This article will talk about everything you need to know about rain shower head installation in a comprehensive step-by-step guide. Without any further ado, let’s get started.
How to Install a Rain Shower Head: A Step-By-Step Tutorial
1. How to Choose a Shower Head
There are some factors to consider when purchasing a shower head. For beginners, the length of the arm should be a factor to put into consideration since most times; it depends on the tub size or the stall of the Shower.
Most tubs have a 7 inches sized shower head; on the other hand, arms that are within 10 inches or longer than 10 inches are useful when carrying out an overhead installation.
Another significant factor to give attention to is to ensure the head of the shower is not extremely low when compared to the height.
2. Gather Supplies
Before the process of installation, you will need to carry out a quick check on all the items need for the procedure. Run a proper check and ensure none of the assembling pieces or tools is missing.
Now place a rag directly on the surface of your drain; this will help prevent the piece from sliding inside the drain. Check out the height and length of the shower arm and ensure it is not too low.
3. Uninstall the Old Shower Head
You can use wrenches or pliers to loosen the Shower a bit from the arm. Ensure you have your rag placed around the wrench or plier to prevent the shower head from scratch.
4. User Plumber’s Tape
Once the older Head is off, wrap up the layer along the threads with plumber tape. Make sure the tape covers the entire threads.
This will allow the head to create a perfect seal and control water escape at the side of the shower head. When this is in place, it helps maintain water pressure.
5. Install
You can make use of a plier or a wrench to fasten a new shower head. But if the shower head has a polished finishing then the use of pliers can lead to scratch on the surface.
If you intend to prevent such occurrence, you can screw the head of the arm using your hand. All you need to do is make sure the threads are in tandem and are suitable for free movement.
6. Cleanup
Now that you have your new shower head-on, take off the fabric you placed on the drain and tools that were placed in the tub. Make use of the box you unboxed the new shower head, use it as a tool box; place all your tools in it.
Most times, there are possibilities of falling back to those old units for reuse.
7. Test
Once all is set and done, turn on the source of water supply and check out the head for leakages. If you find any, make sure the head is appropriately fastened and the plumber’s tape is placed properly around the thread of the installed head.
Do this until some of the tapes are exposed after tightening. Check out the outlets on the wall and all the connections to see if there is leakage.
8. Escutcheon
Escutcheons are yet another form of rain shower heads. The shower head can be installed close to the ceiling or walls of your building. Most escutcheons are flat inserts that you can use to protect the surface of the wall from becoming wet.
If you intend to install it in the absence of a plumber, it is essential to ensure you place enough amount of tape (plumber’s tape) all over the thread connections; then you can progress down from the shower head.
9. Other Tips
If you want to fix a shower arm, it is vital to first install the head. Doing this will make the entire process of installation a lot easier and create enough room to fasten the entire arm of the outlet on your wall.
Additionally, the amount of pressure will reduce in accordance with the number and size of the nozzles on your shower head. If you prefer a pressure over style, then we recommend buying small-sized Head, which generally has a few numbers of vents.
10. Ceiling Installations
Rain shower heads often appear more charming when installed in ceilings. Aside from their awesome looks and many benefits, most rain shower heads are pretty heavy and can be too much of a weight when installed directly to a shower arm.
That been said, no installation is compared to a shower head that runs directly overhead.
When you have to install a shower in a new bathroom, then the ceiling installation is a suitable option. If you can carry out plumbing with soldering, then there is a higher possibility you can do this out yourself.
While doing this, it is essential to bear in mind that the process is not as easy as a faucet installation. So, we recommend the attention of a professional for more durable and permanent job.
11. Wall Installations
Sometimes the expenses of carrying out supply lines can be too much. In such scenarios, the rain shower can still be used; all you need is to locate the right arm for the shower.
- Take out the right measurement of the arm of your shower; starting from the center of the arm down to the floor. Then measure out the height that is approximately that of the tallest person that will use your shower.
- All shower head has a recommended installation; and this is a couple of inches above the tallest height in your home.
12. Connecting a New Rain Shower Head
Whether you have a shower arm attached to your ceiling or to the walls of your building, the process of installing a shower head is pretty similar. It’s simple; all you need to do is connect the arm to the rain shower head.
To conclude, taking shower can actually make you ill if the shower head becomes a breeding ground for harmful bacteria. Proper rain shower head installation can fix this issue and allow you to enjoy a relaxing bath every time. That’s why the installation process is so important and you should pay close attention to what you are doing.
Hopefully, this comprehensive guide will point you in the right direction and make the installation process much easier. Once you install the showerhead properly, you’ll be able to enjoy a refreshing bathing experience for years to come.
FAQs
Q. 1: How much does it cost to install a rain shower?
Ans. A shower head range around $250 and will cost $600 if all the installation process are carried out. This includes lines to control the loss of water pressure and the attachment of a wall handle on the valve.
Q. 2: How high should a rain shower head be installed?
Ans. Fix the shower head 80” above ground level. But if you are installing a rain head shower 84” will be advisable, to create a rainy feeling as the water drops from a height above.
Q. 3: Do rain shower heads use more water?
Ans. Rain shower head, when compared to the standard head, won’t produce sufficient pressure. So, if you prefer pressure over fancy styles, we recommend a standard showerhead. However, the rain shower head provides more flow of water on your body since it has a wider flow area unlike the low flow shower head.
Q. 4: Do rain shower heads have good pressure?
Ans. Usually, most rainwater shower head operates with less pressure. If you prefer Shower with higher pressure, then going for a traditional rain shower head will be a better move that will help enhance your experience.
Q. 5: Why does my shower have no pressure?
Ans. There are considerable amounts of factors that can lead to low or slow water pressure. This can most times be due to blockage on the nozzles of your showers, or valves that are accidentally turned off due to blocked pipes or leaks occurring in some spots. And Most times, this is caused by different factors.

Leave a Comment