
Not all of us are lucky to have a plumber in our family. If your toilet is moving when you sit down, you need to know how to shim a toilet yourself.
If not fixed, it can cause pooling water (if there is a leak) that will rot the floorboards and the ceiling below the toilet (if it’s an upstairs toilet). Also, mold and mildew come with wet wood and plaster.
If there is water leaking, it may also have sewage in it. Make sure you are wearing gloves and clean the area with bleach if this has happened.
If there is leaking, there is a chance that sewer gas is escaping; no one wants their house to smell like an outhouse in the summer. So you need to get this fixed immediately
Why is Your Toilet Rocking?
- Your floor has settled and the toilet has stayed in place
- The flange is a bit higher than your floor (the flange connects your toilet to the drainpipe), lifting the toilet a bit in the center. As a result, the toilet is now elevated and can rock from side to side.
- The blots on the side of the toilet are loose
- Your wax ring has lost its seal
How to Shim a Toilet?
Step 1: Gather Your Tools First
- A level
- Shims – preferably plastic or rubber
- Caulk -the color of your floor or the base of the toilet make sure it is tub and tile caulk
- Pliers
- Flat-head screwdriver
- Paper towels and a rag
- Box cutter or utility knife
- A few baby wipes
Step 2: Turn off the water
Anytime you are going to work on the toilet you should turn off the water. Realizing the water should be off as it is leaking all over the floor is no fun. There are two ways to turn off the water.
- Turning it off at the main
- Using the water inlet valve
The water inlet valve is on the left side of the toilet under the tank. Turn it clockwise to shut the water supply to the toilet off.
Step 3: The bolts are loose
The quickest and easiest check for that rocking toilet is loose bolts. There are two flange bolts on each side of the toilet that secure it in place.
Unfortunately, covering them is a cap that you will have to pop off before you can check these. Place the screwdriver under the edge of the cap and pull upwards; it should come right off.
Using the pliers, snug up the bolts. DO NOT OVER-TIGHTEN you can crack the porcelain, and then you will have to replace the toilet!
Turn the bolt a little, then check the toilet to see if it moves. If you have snugged both bolts and the toilet no longer rocks, you are done. If that toilet is still wobbly, you need to see step #2.
Step 4: Inspect for leaks
Before you do anything else, you need to make sure the toilet is not leaking. First, look at the base of the toilet for water and moisture. If you can’t really tell, put a piece of paper towel near the bottom if there’s a leak that will soak it right up.
Bad news: if there is leaking, you need to change the wax ring. This means the toilet will have to come off.
When wax rings get old, they can shrink or compress, which means it is no longer watertight or airtight. But, don’t panic…you can change the wax ring yourself. If there is no leaking, you can start to shim.
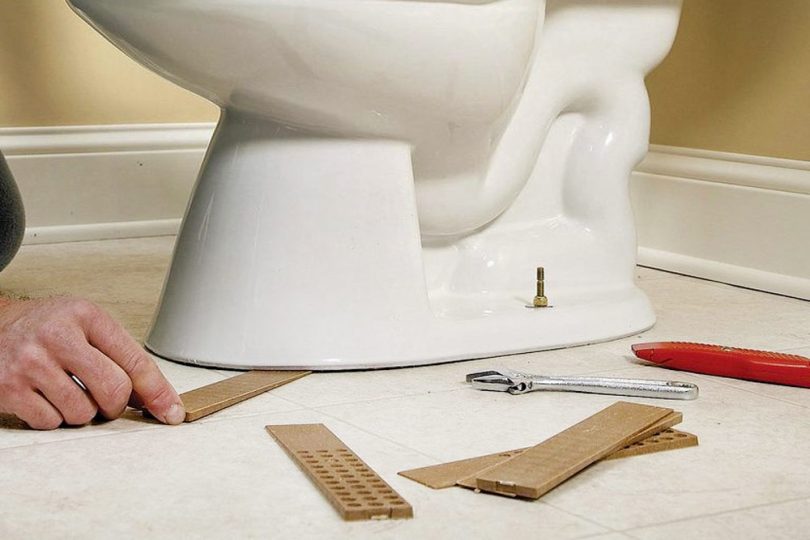
Step 5: Find the gaps
Look at the toilet’s base for any space between the floor and the base of the toilet. No gap is too small. Slide a shim in that space, do not force it, slide it in the gap and try to rock the toilet.
When it comes to shims, use rubber or plastic. DO NOT USE WOOD. Wood sucks up water and compresses over time. So, it is a poor choice for a toilet shim.
You want the shim to be solid and waterproof and will not compress. Some people use change; money is for spending, it’s not for shimming your toilet.
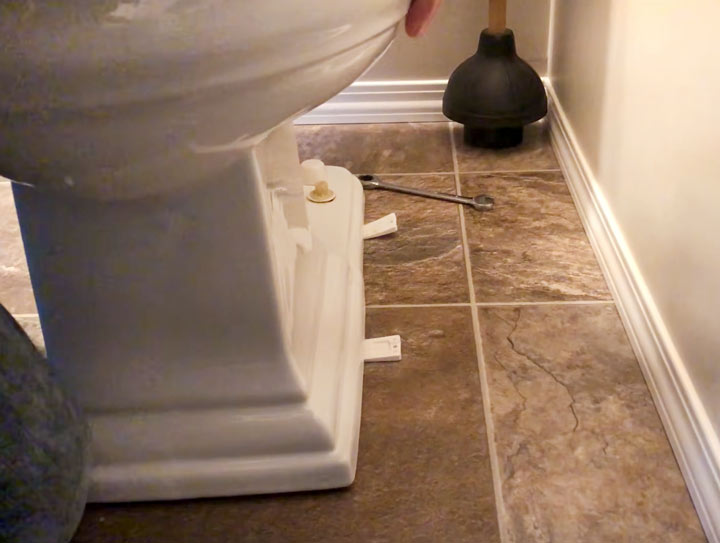
Step 6: Shimming the toilet
If it still moves, see where the other gaps are and shim them as well. You may need to shim in several paces before the toilet is stable. This is trial and error; shim then try and rock the toilet until it no longer rocks.
Once the shims are in place, close the toilet lid and place the level on it. When the bubble is between the lines, your toilet is shimmed to perfection.
If all the trial and error is too much for you, grab the level and place it in the lid. Watch the bubble; the bubble will be the side of the toilet where you will need the shim.
Leave the level on the toilet as you add the shims. Once the bubble is between the lines, you are level and can test for wobbling.
Step 7: The shims need a trim
Make sure your shims will not move but don’t shove them in too tight; they can lift the toilet off the ring.
Using the utility knife, cut off the excess shim at the toilet’s base.
Be careful not to damage the bathroom floor.
What type of shim to use?
There are several types of shim available for fixing a wobbly toilet. Among them, rubber and plastic shims are most widely used. Other types include wooden shims and even pennies.
You should not use hard shims as they can crack your porcelain. Additionally, water can damage your wooden shims. Plastic shims are the best option because they are more durable and stable.
Plastic shims have two types, hard plastic, and soft/flexible plastic. A flexible plastic is made of soft but durable, composite, and recycled plastics, which makes it a perfect fit for shimming toilets. They don’t get affected by water, and are soft enough to cushion your porcelain.
Plastic shime also provide varies multitude of rigidity. As a result, they’re the best type of shims to be used to level your porcelain toilet.
Caulking the Base of the Toilet
Caulking makes the job look finished and hides the shims. It also keeps the moisture from mopping your floor away from the base of the toilet. If water can get under there, so can urine that can be very aromatic when you can’t clean it out of that space.
Grab a baby wipe and the caulk. Read the caulk directions and see how long the caulk will need to set up. You will need to apply the caulk evenly around the toilet, leaving the back of the toilet uncaulked. Leaving the back uncaulked allows water to leak out if there is ever a leak, alerting you to the new problem.
As you caulk, you may need to smooth the caulk with your finger. Moisten your finger on the baby wipe; you will need to keep this finger moist and free of excess caulk to do the job right. Once you are done, you can use the baby wipe to clean any excess caulk on you or the toilet.
The caulk needs to dry
Before you can use the toilet again, let the caulk dry. Once the caulk is dry, it is business as usual.
What if the Toilet Is Still Wobbling?
You’ve finished the job and the toilet still rocks. Or it was stable for a while and started to rock again.
If you’ve checked the flange bolts and reshimmed the base and it’s still rocking, you have a bigger problem.
The problems are probably under the toilet in the flange or with the wax ring.
Remove the toilet and see what needs to be done. Try not to get discouraged; you can do this yourself as well.
The truth is, if you are sick of the problem, you can always call a plumber as a last resort!

Leave a Comment