
Modern construction requires drywall because it is widely accessible, inexpensive, and readily available. The quick and easy way to cover a wall with gypsum-based materials is by cutting them to size and attaching to wall studs.
However, while drywall is an essential part of almost every home, some kinds of drywall perform better in humid environments.
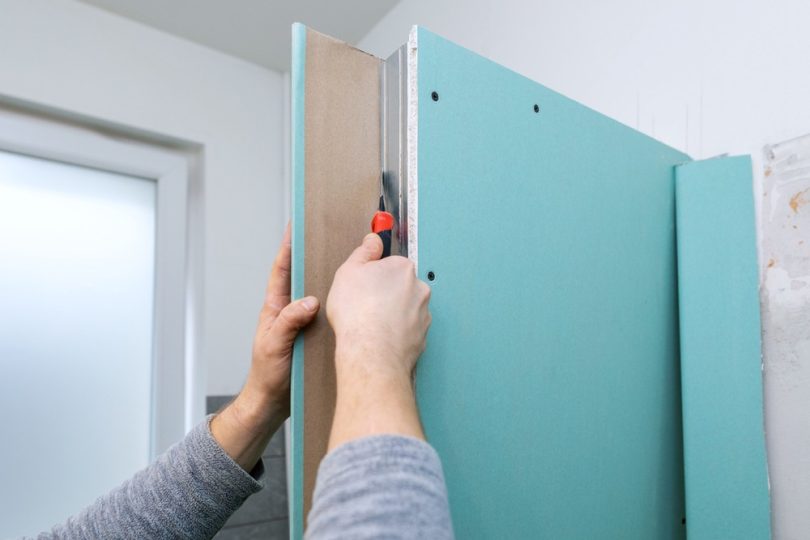
What is a green board? Good question!
Drywalls that can tolerate high moisture levels are often referred to as green boards. Modern construction has phased out the use of this material, but you may find yourself using it for a DIY project in your home.
Alternatives to cement boards, such as green boards require less time and effort to install. This type of drywall is identified by its green side, which assists installers to identify.
The green board also helps installers know the areas to apply more mud.
Things you may like about green boards
1. Lasts longer
When you choose green board instead of drywall, you are choosing a better choice because green boards are thicker and better layered.
2. Resists moisture
Mold can grow on drywall tile backer if it’s exposed to high humidity. The semi-water-resistance of green boards makes them perfect for humid climates.
3. Easy installation
You can install the panels alone in smaller areas. Having already installed studs makes this process even simpler, such as installing a green board over the installed drywall.
Things you may not like about green boards
1. Not waterproof
Green boards are common in bathrooms across the world, particularly around coastal areas, but they should not be installed where they are directly exposed to water. These boards are not waterproof.
2. Not fireproof
In any function al kitchen, there is a fire hazard of some sort. Similarly, a green board needs to be placed away from water splashed areas, the same as areas that pose a fire risk, like near a stove. Installing in a bathroom is a low fire risk.
Tools to install green boards around the bathtub
- Green board
- Utility knife
- Straightedge
- Drywall saw
- Fiberglass mesh tape
- Fiber cement
How to Install Green Board Around a Bathtub?
Water-prone areas like bathrooms should be covered with green-board drywall.
Instead of using standard drywall screws, use hot-dipped galvanized ones. As few seams as possible can be achieved by setting panels vertically or horizontally.
Make straight lines with the utility knife
Make straight lines on the green board with a utility knife and straightedge. With the knife, score the board, then break it against the straightedge.
Use a drywall saw to make round cuts for openings and pipes.
Mesh tape should be applied to seams
Rather than using paper on seams, apply fiberglass mesh tape. The pasted side should be stuck to the green board, then spread the drywall compound using a knife.
Now feather the edge to create a smooth join.
Put up a 5/8-inch green board on the ceilings
Whenever the joists are 16 inches or more apart, use 5/8-inch green-board drywall; for ceilings with 12-inch joists, use 1/2-inch green board.
The best green-board products will have more than just a water-repellent surface; some may be treated with silicon to ensure even greater water resistance.
Drop water on the exposed gypsum area of the green board; if it puddles, it has been treated.
Cover green-board drywall with a fiber cement
In showers and bath enclosures exposed to direct water, cover green-board drywall with fiber cement, which eventually will be covered with ceramic tile.
If the area around the toilet and around the sink is moist, use a standard green board.
Paint green board once installed
Install the green board and then paint with water-repellent paint. Apply a bath enamel to walls and ceilings where the board has been installed.
Your green board should never be directly tiled because it will cause the tile joints to erode over time, eventually dissolving the drywall.
Contractors vs DIY: How should you do it?
Most of the smaller tasks within this overall project can be done by you unless your bathroom is unusually large.
DIYers tend to hire electricians and plumbers for core bathroom remodeling, but do the rest themselves. The entire project can be done by a DIYer for surface-level renovations that don’t require major changes to the wiring and plumbing.
Professionals will complete the job faster if you want the job done quickly.
When is green board required by code?
In bathrooms, where humidity can enter through the tiles in the shower and tub, building codes often require water-resistant green boards to be installed.
The American Society for Testing & Materials ASTM C1396 code specifies that gypsum boards should be water-resistant to serve as a foundation for plastic or ceramic tiles
When is the green board not required by code?
For the same reasons discussed above, building codes prohibit the use of green boards in places where humidity is high, such as saunas, steam rooms, and indoor pools.
The backing board’s material won’t hold up well in these conditions.
Green board versus cement board
Shower boards made of cement are better for your shower since they contain more water-resistant cement.
Although the green board has water resistance, it does not have waterproof properties. It can become damaged by splashes or puddles of water.
Why it isn’t advised to use for bathroom ceilings
Building inspectors generally discourage the installation of the green board on bathroom ceilings. Moisture is a common problem on bathroom ceilings, so heavy and weaker boards are more likely to fail.
If you are going to green board your ceiling, make sure the sheets are fastened to the joists every 12 inches.
If you want to finish a bathroom ceiling with paint, it’s safer to use standard drywall.
Quick green board installation tips
- It is possible to install a green board on studs and joists using screws at regular intervals.
- Ideally, the drywall should be fastened at shorter intervals, to avoid sagging of the weaker board
- It is advisable to tape all screws and seams and then apply the joint compound evenly before painting.
- Even though green boards are water-resistant, it is recommended to paint them with high-moisture paint.
FAQs
1. Can I use a green board over a vapor barrier?
Ans. No, you cannot. Doing so will create a double moisture barrier. Use cement backer board instead.
2. Can the green board be painted?
Ans. After installing the green board, it can be painted as long as you use the right primer beforehand so the paint sticks.
3. Can I tile over the green board?
Ans. Tiling directly over the green board cannot be done. You need to seal the wall first to stop moisture seeping in. Otherwise, it will become weak and result in mold growth.

Leave a Comment