
You come home from a long day of work to find your bathroom floor flooded with water. No, you didn’t live the faucet on before living. All you hear are drops. Ominously dipping from a crevice. You find corrosive green surrounding the cracks. Yes! Your plumbing needs changing. That would need replacing.
Replacing, in this case, make sense. You do not know the number of bacteria that crack is potentially bringing into your bathroom. Prevention is better than cure. However, for the preplacement, we are sharing our DIY guide for replacing a shower valve so that you can learn how to replace a shower valve by yourself. Let’s get started.
How to Replace A Shower Valve
Divided into two phases is the method in replacing the shower valve: of course, it consists of removing the old valve and replacing it with the old one. There are a lot of reasons why it is necessary to replace the shower valve. The most popular reason why people do is for the installation of their new pressure-balanced valve which will pick out any fluctuation in temperature in the pipes. When someone is using another appliance in the system, the pressure balanced valve does the most relevant job of checking for pressure drops while we are showering at the same time. This is lifesaving!
Replacing the shower valve might be very tricky and would require that you have skill in soldering metal pipes and fittings. This self-help is divided into two phases for the purpose of its delicate nature.
Essential Tools
- Screwdrivers
- Utility knife
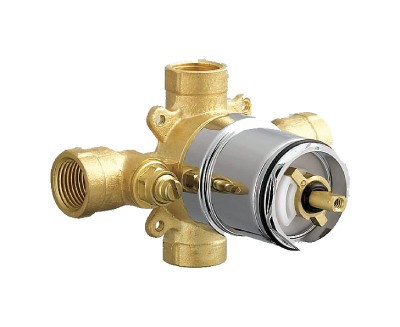
- New shower faucet
- Channel type filter
- Allen wrench
- Mini hacksaw
Phase 1: Removing the Old Shower Valve
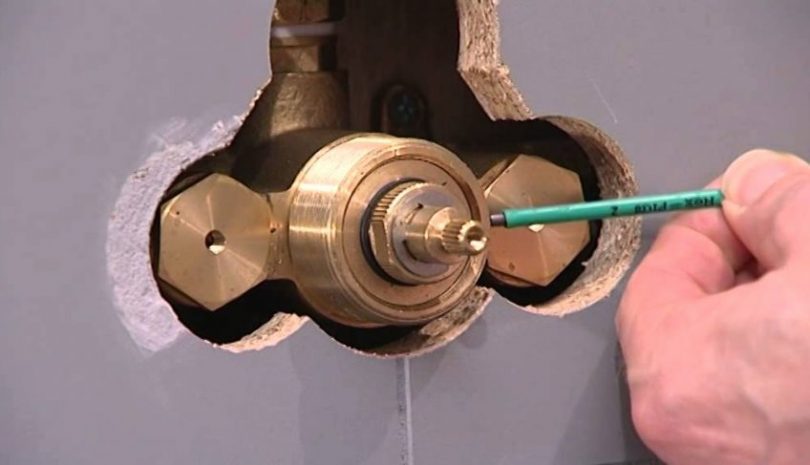
The first phase requires that you remove the shower handle, use a screw or an Allen wrench in removing the screw and then the handle. Usually, the screw is placed directly behind the cap. Sometimes they can appear in a different place. That is why you need the Allen wrench. You might need a cloth to cover the shower drain so as to avoid screws from falling through the pipe.
Linked directly under the showerhead is the escutcheon trim area.
This has to be removed to get to the shower valve. Remove the handle and get to the second wave of screws holding the trim plate together. Unscrew the two sets and get the escutcheon trim off the wall. Sometimes there is caulk if you find it you would have to get to that also by using the utility knife to cut out the rolls of caulk, this is the only way the late is coming off in this instance.
Sometimes it might be convenient to enlarge the faucet opening in the wall to remove the plate. If you have to widen the wall. Make sure that the hole is not too large so as to reduce the cost to repair the wall.
You have to cut open a bigger hole to remove and install new valves. You can choose from two options; you can cut open the wall behind the plumbing opening, or you can walk through opening surrounding the pipe.
It is more comfortable to work from the front. Widen the opening surrounding the shower. If the surrounding opportunity is made of fiberglass, it is convenient to open the hole with pliers. There are different techniques used in cutting through different materials in the valve opening.
You have to be sure hole is not too wide as a guide try to use the plate you have to determine the size of the hole you are going to create.
You have to decide the way you are going to remove the old valve and also how you are going to replace it with the new one. In most cases, the shower valve has an externally threaded connection, and also there is a soldered coupling inside the valve. In this case, we have to position our new valve in front of the old one so has to determine where we can cut the pipes out.
Most valves are different, so you may have to determine yourself were to plan the cuts. You may also have to find other fittings and couplings to link the pipes into our new valves.
This is where you make your list before going to the store. Make sure all your materials are ready.
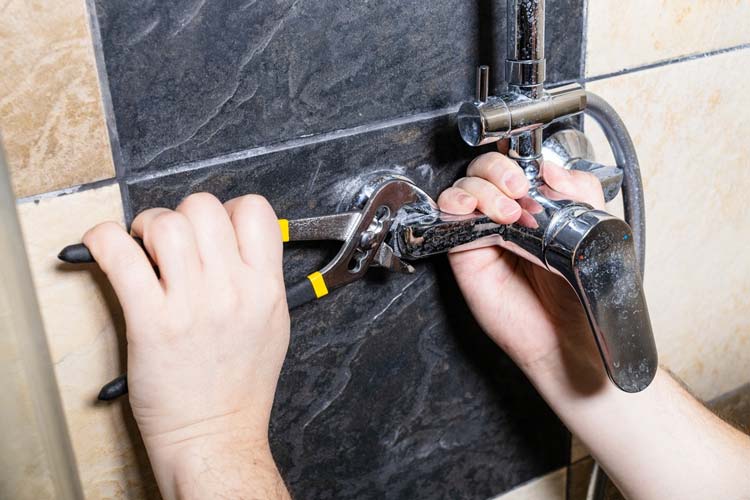
Go and put the water off and with the appropriate tool, cut out the old valve. Make sure you live enough copper fitting for the new valve. Tools such as the copper tubing slicer are one convenient tool for this process and for any other method. You can also use a mini hacksaw which works just as well. Movements in the pipes will determine the ease in installing the new valve, however, without the movement you can still do the work.
Phase 2: Installing/Replacing a Shower Valve
- To install the shower valve; you have to clean the copper pipes making sure that they’re free from any solder or burns.
- Take out the plastic ridge and any other housing before you continue with the soldering. The plastic parts might not be able to resist the heat. Do not forget how the cartridge comes out that is the same way you want to put it back into the round.
- Make your adjustments before placing the shower valve back into the wall. Do not forget to apply flux in any of the valve connections.
- Keep the valve in position. Be careful you do not drop the valve in the wall while placing them. Try to get it in there in one try as it might be difficult to get I there. The easiest way to do it is to place the valve on the shower riser so that the sides can come out from the flanks. Make sure that you push the valve deep in so that there is a good joint. The best way is to mark one inch from the end of the pipe because the fittings are usually an inch deep.
- Solder the valve in place. Be careful soldering in small areas. To avoid any fire outbreak have a bottle of water or a fire extinguisher within arm’s reach.
- Make sure the valve is cool before placing the shower cartridges. It is better if the shower valve is off. Put on the water and check if there are any leaks.
- Put the trim and handle back in place. Then the cover plate and then the cartridge sleeve. And the last thing to fit in is the handle.
1. Single Handle Shower Valves
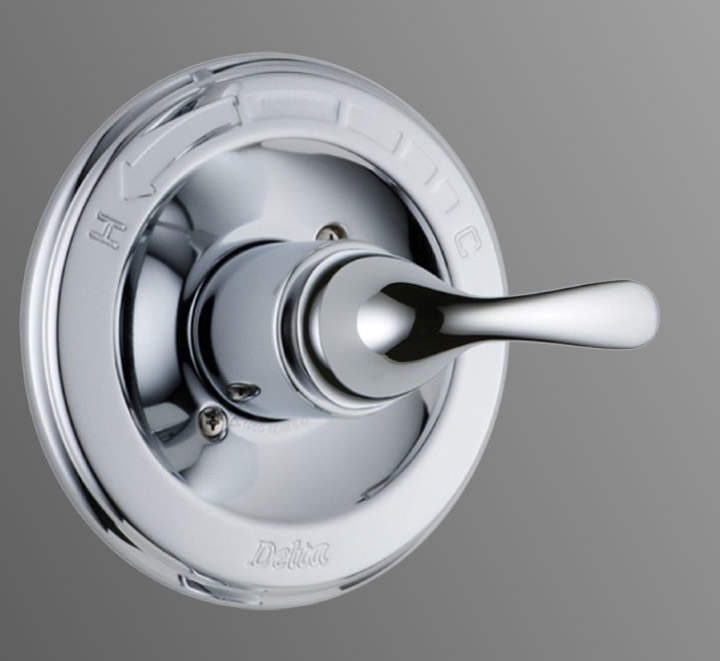
- Put off the water
- Find the shower knob screws. Loosen these screws usually hidden under an aesthetic cap.
- Determine the removal method by looking at them under the tub spout. Occasionally tub spouts would link onto pipes with some male threads. Use the right tool.
- Grab the shower arms still, using pliers then turn anticlockwise the showerhead. Remove the used shower head.
- Assessing the single handle shower valves depends solely on depends on what type of project you are planning. During the renovation, it is not rare to see a contractor removing everything leaving exposed pipes, so finding the whole depends on what you prefer, you can assess it directly opposite the pipes.
- Cut all of the tubes (hot and cold). Measure the cut to an inch above the higher than the remaining fitting.
- Verify the depth of the new valve holding it against the old one adjusting the bracing.
- Clean the openings of the pipes thoroughly.
- Install the cap on the tub stem and close the shower outlet. A ½ inch fitting should do just okay. Test for leaks by turning the water back on.
- Replace the valve’s depth guide.
Note: if you can get some caulk, use it to prevent moisture that can potentially destroy your wall.
2. Double Handle
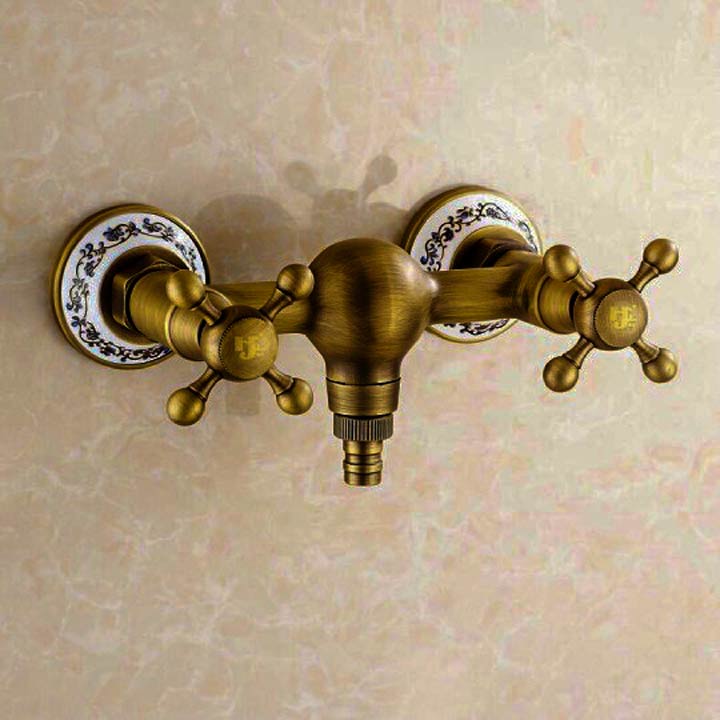
This is easy to replace and not too different from the single handle valves, no matter what the double handle valve is made from the ways in replacing them are basically the same.
- Put off the water to the entire home.
- Remove the handle caps to get to the screw, using a flat-headed screwdriver, this should be easy
- Take off the screws under the handle caps.
- Once the screw is removed from each of the handles you can remove the handle safely.
- At this point, the replacement valves should be ready. Make sure that the handle retaining screw is fitted through the center of all of the handles. Tighten the screws once you are done.
- Place the cap back on and put on the water.
3. 3-Handle

- Put off the water.
- Place a rag inside the tub for protection and to secure small pieces
- Unscrew the handles, they are usually hidden in short-covering that signifies hot and cold
- Get the escutcheon out,
- Using pliers(slip joint) unscrew the valve off the wall
- Replace the valve seats
- The new stem should be placed in the valves and tightened, using the tub-socket
- The bonnets on the stems have to be tightened, before putting the escutcheons
- Screw the handles back to the stem and turn the water back on
4. Ball or thermostatic faucet
- Turn off the water
- Get the faucet handle out.
- To protect the “finish” cover the shower faucet unscrew the collar that handles the ball-assembly cover.
- Slowly take the lid off
- Remove the springs if they haven’t fallen out yet.
- Remove the rubber gasket inside the hole. Replace both the gasket and the springs down as you screw the collar back
- Force the gasket down the outlet and fit the springs to make sure that the ball is set on top of the spring, pushing it as the collar is screwed back on. Tighten the collar using adjustable pliers.
- Turn back the water and test the faucet.
Full-on replacing the shower valve has its benefits. No matter what types of shower valves you have, replacing them requires great skill and practice. Having a showerhead looking like a Frankenstein’s beast doesn’t seem too attractive, and doing it your self can save you a lot of expenses. Money which can be invested in other beneficial things. Not to talk less of the feeling of accomplishment after getting your hands dirty. It is time to have a great shower.

Leave a Comment